Three ways to render in Rhino
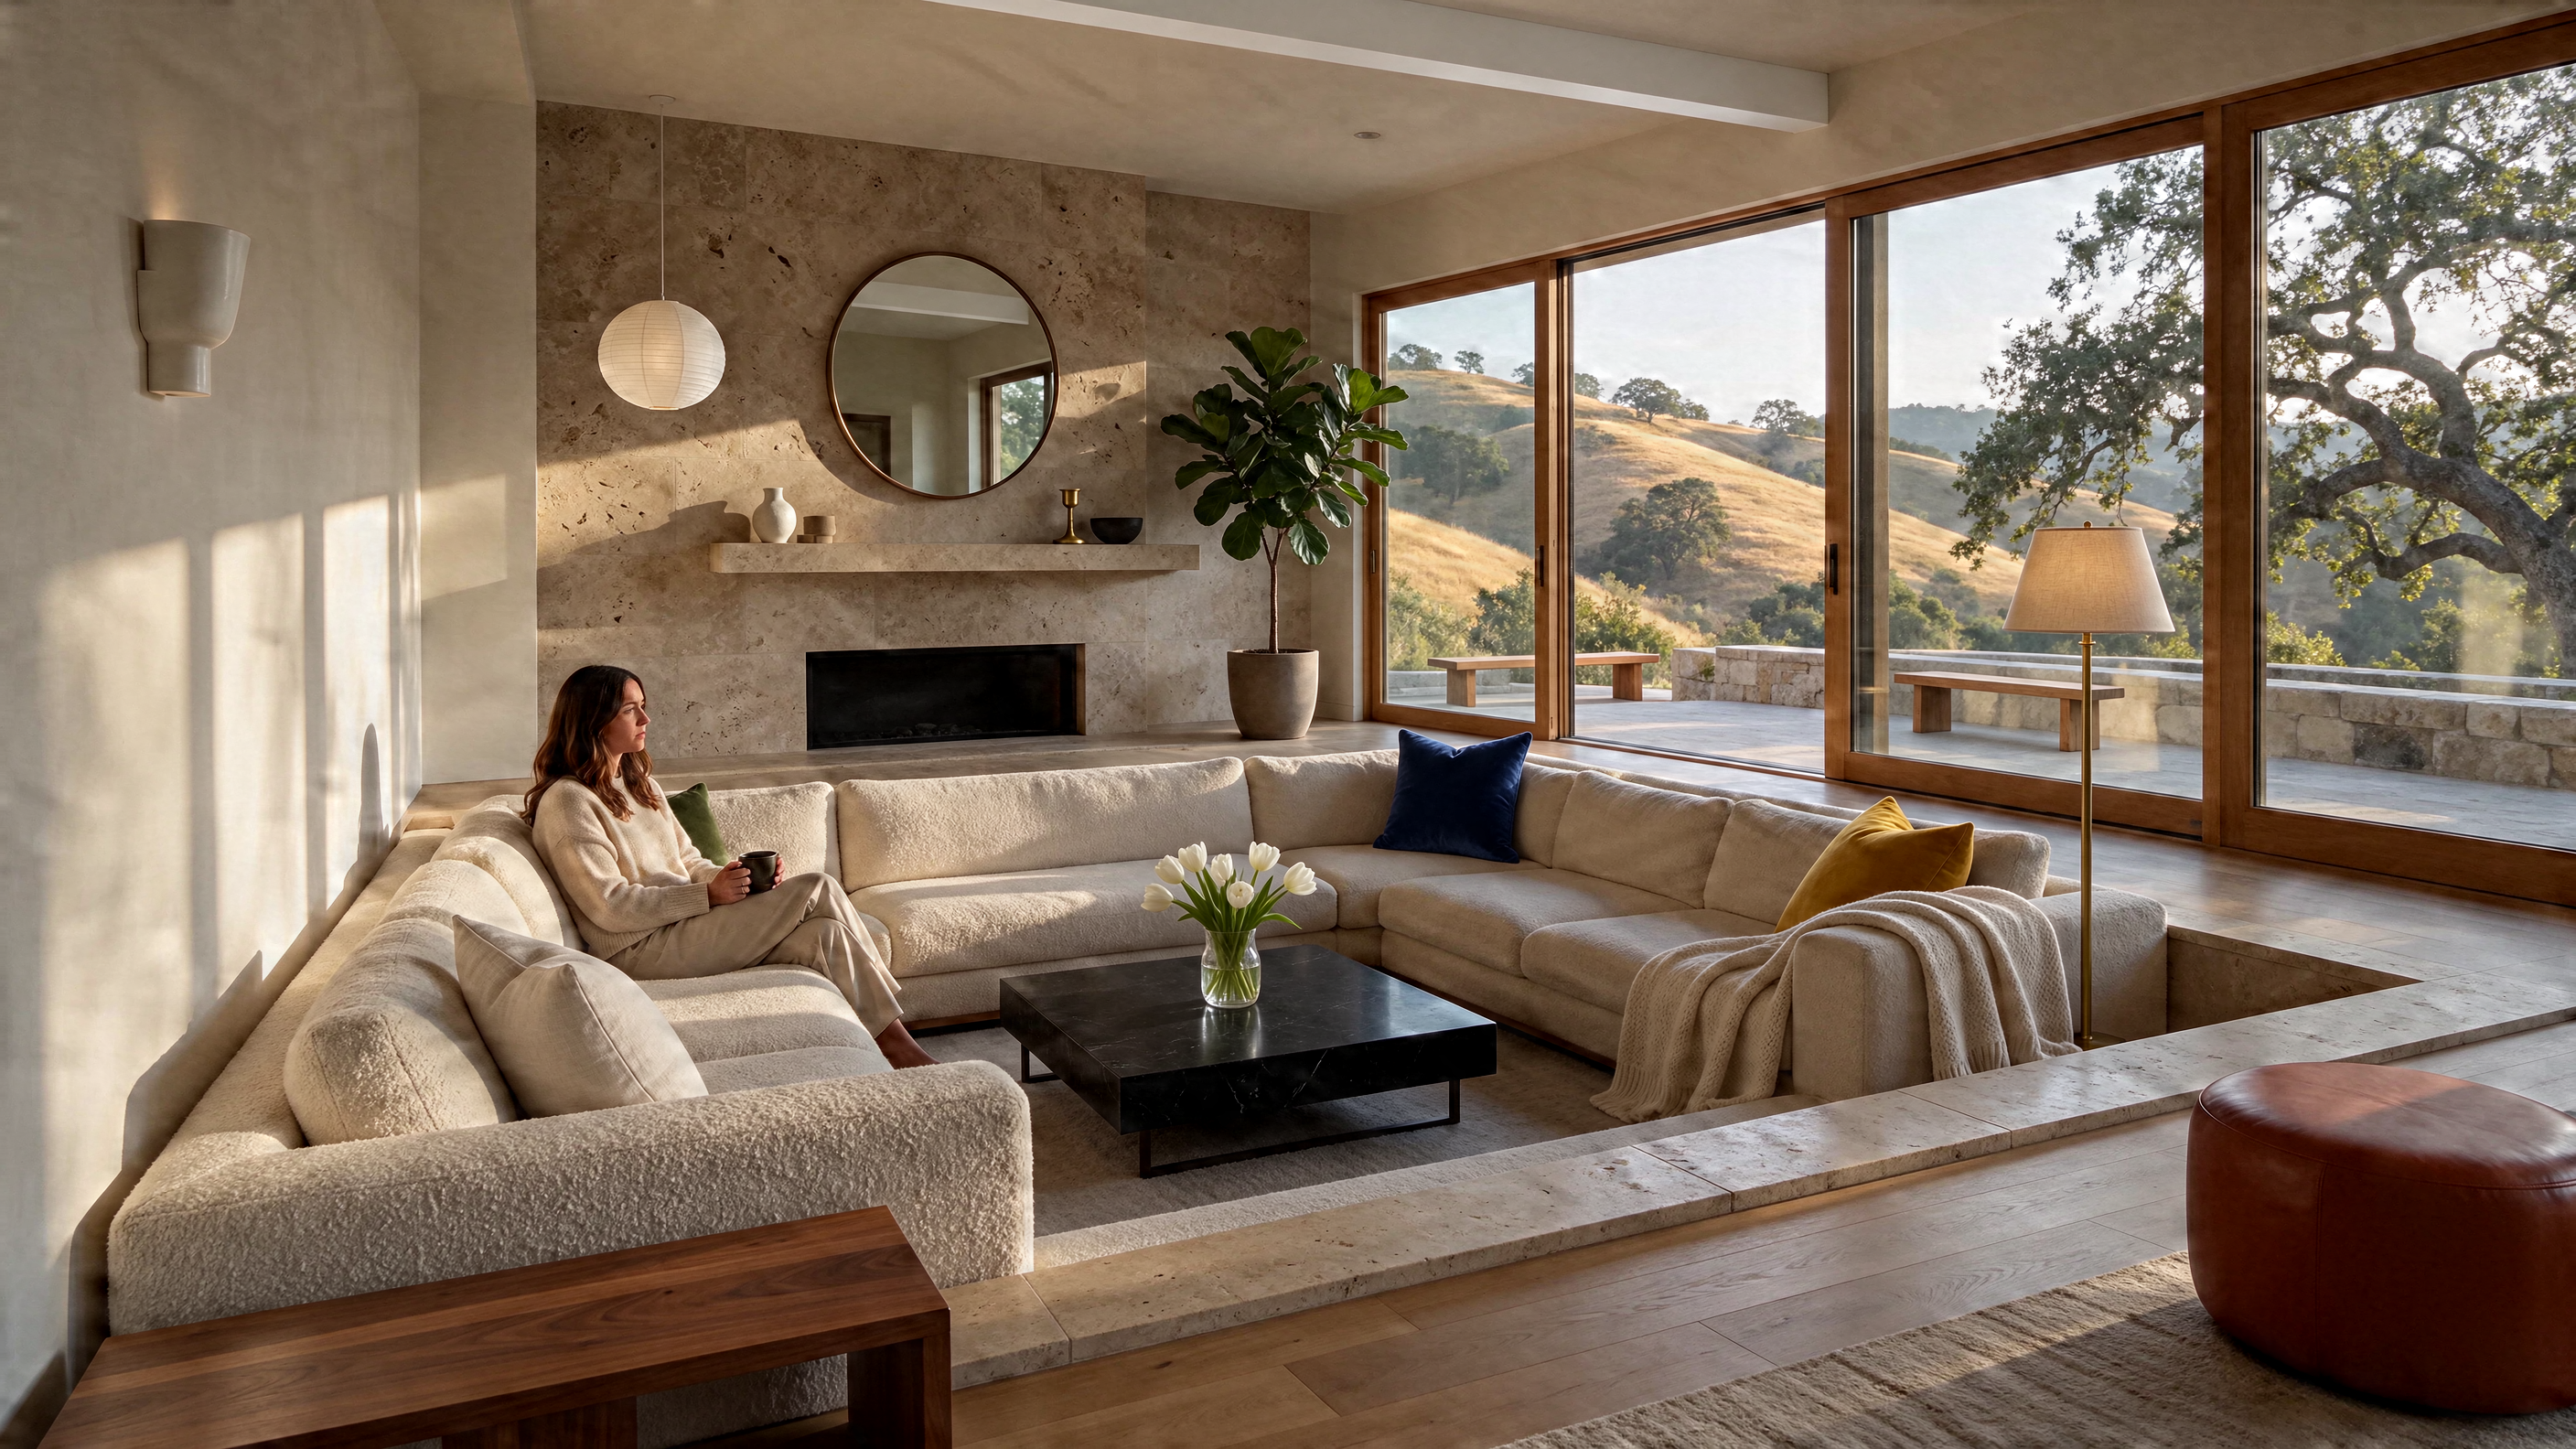
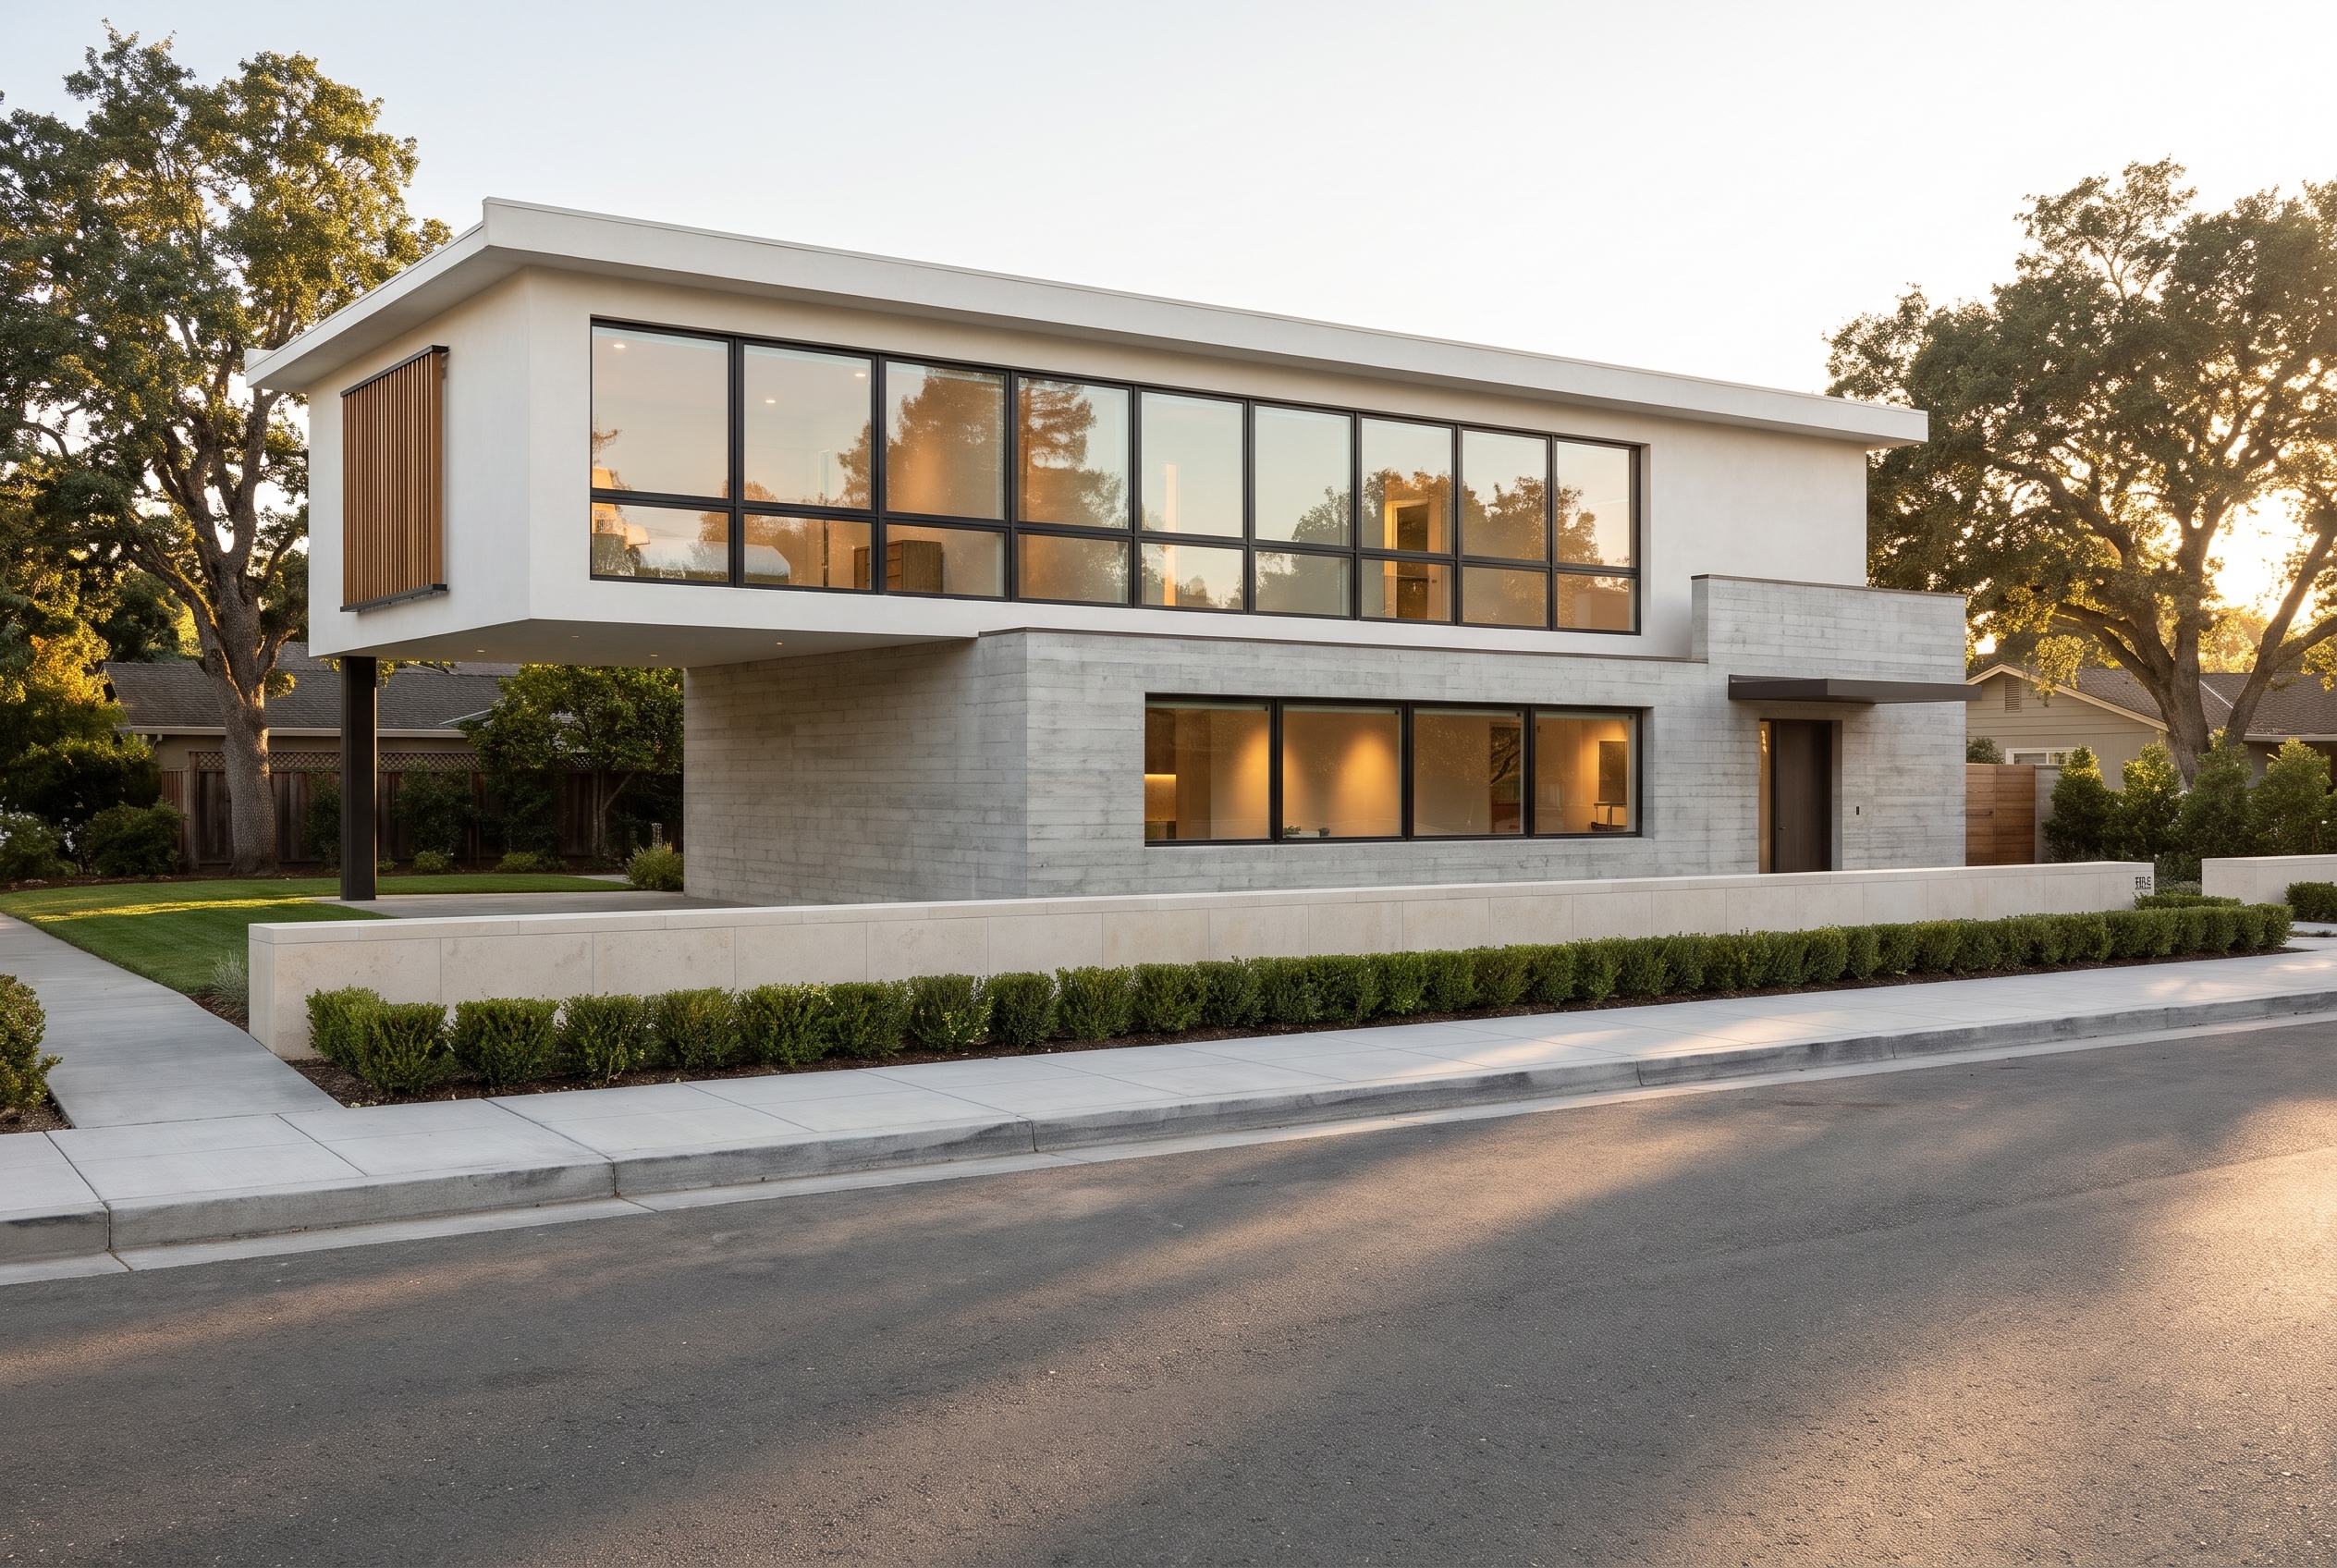
Rhino rendering usually means one of three routes. The Rendered and Raytraced display modes and the Render command use Rhino's own renderer. Plug-in engines add their own materials, lights and render windows. And an AI render, the kind Lovspark makes, starts from a plain viewport capture and fills in materials, landscape and light for you.
The first two routes need a finished scene. McNeel's own help says objects "will render white until you add render color, highlight, texture, transparency, and bumps". Our test model had no materials yet, and the Rendered mode showed exactly that.
| Route | What you need first | Speed | Best for |
|---|---|---|---|
| Rendered / Raytraced / Render | Materials, lights, environment | Minutes to hours per image | Final images with exact materials |
| Render plug-ins | A plug-in license plus a full scene | Minutes per image once set up | Studios with a set pipeline |
| Lovspark AI render from a capture | One clean viewport capture | About a minute per image | Concept options and client previews |
Step 1: set up a camera worth rendering
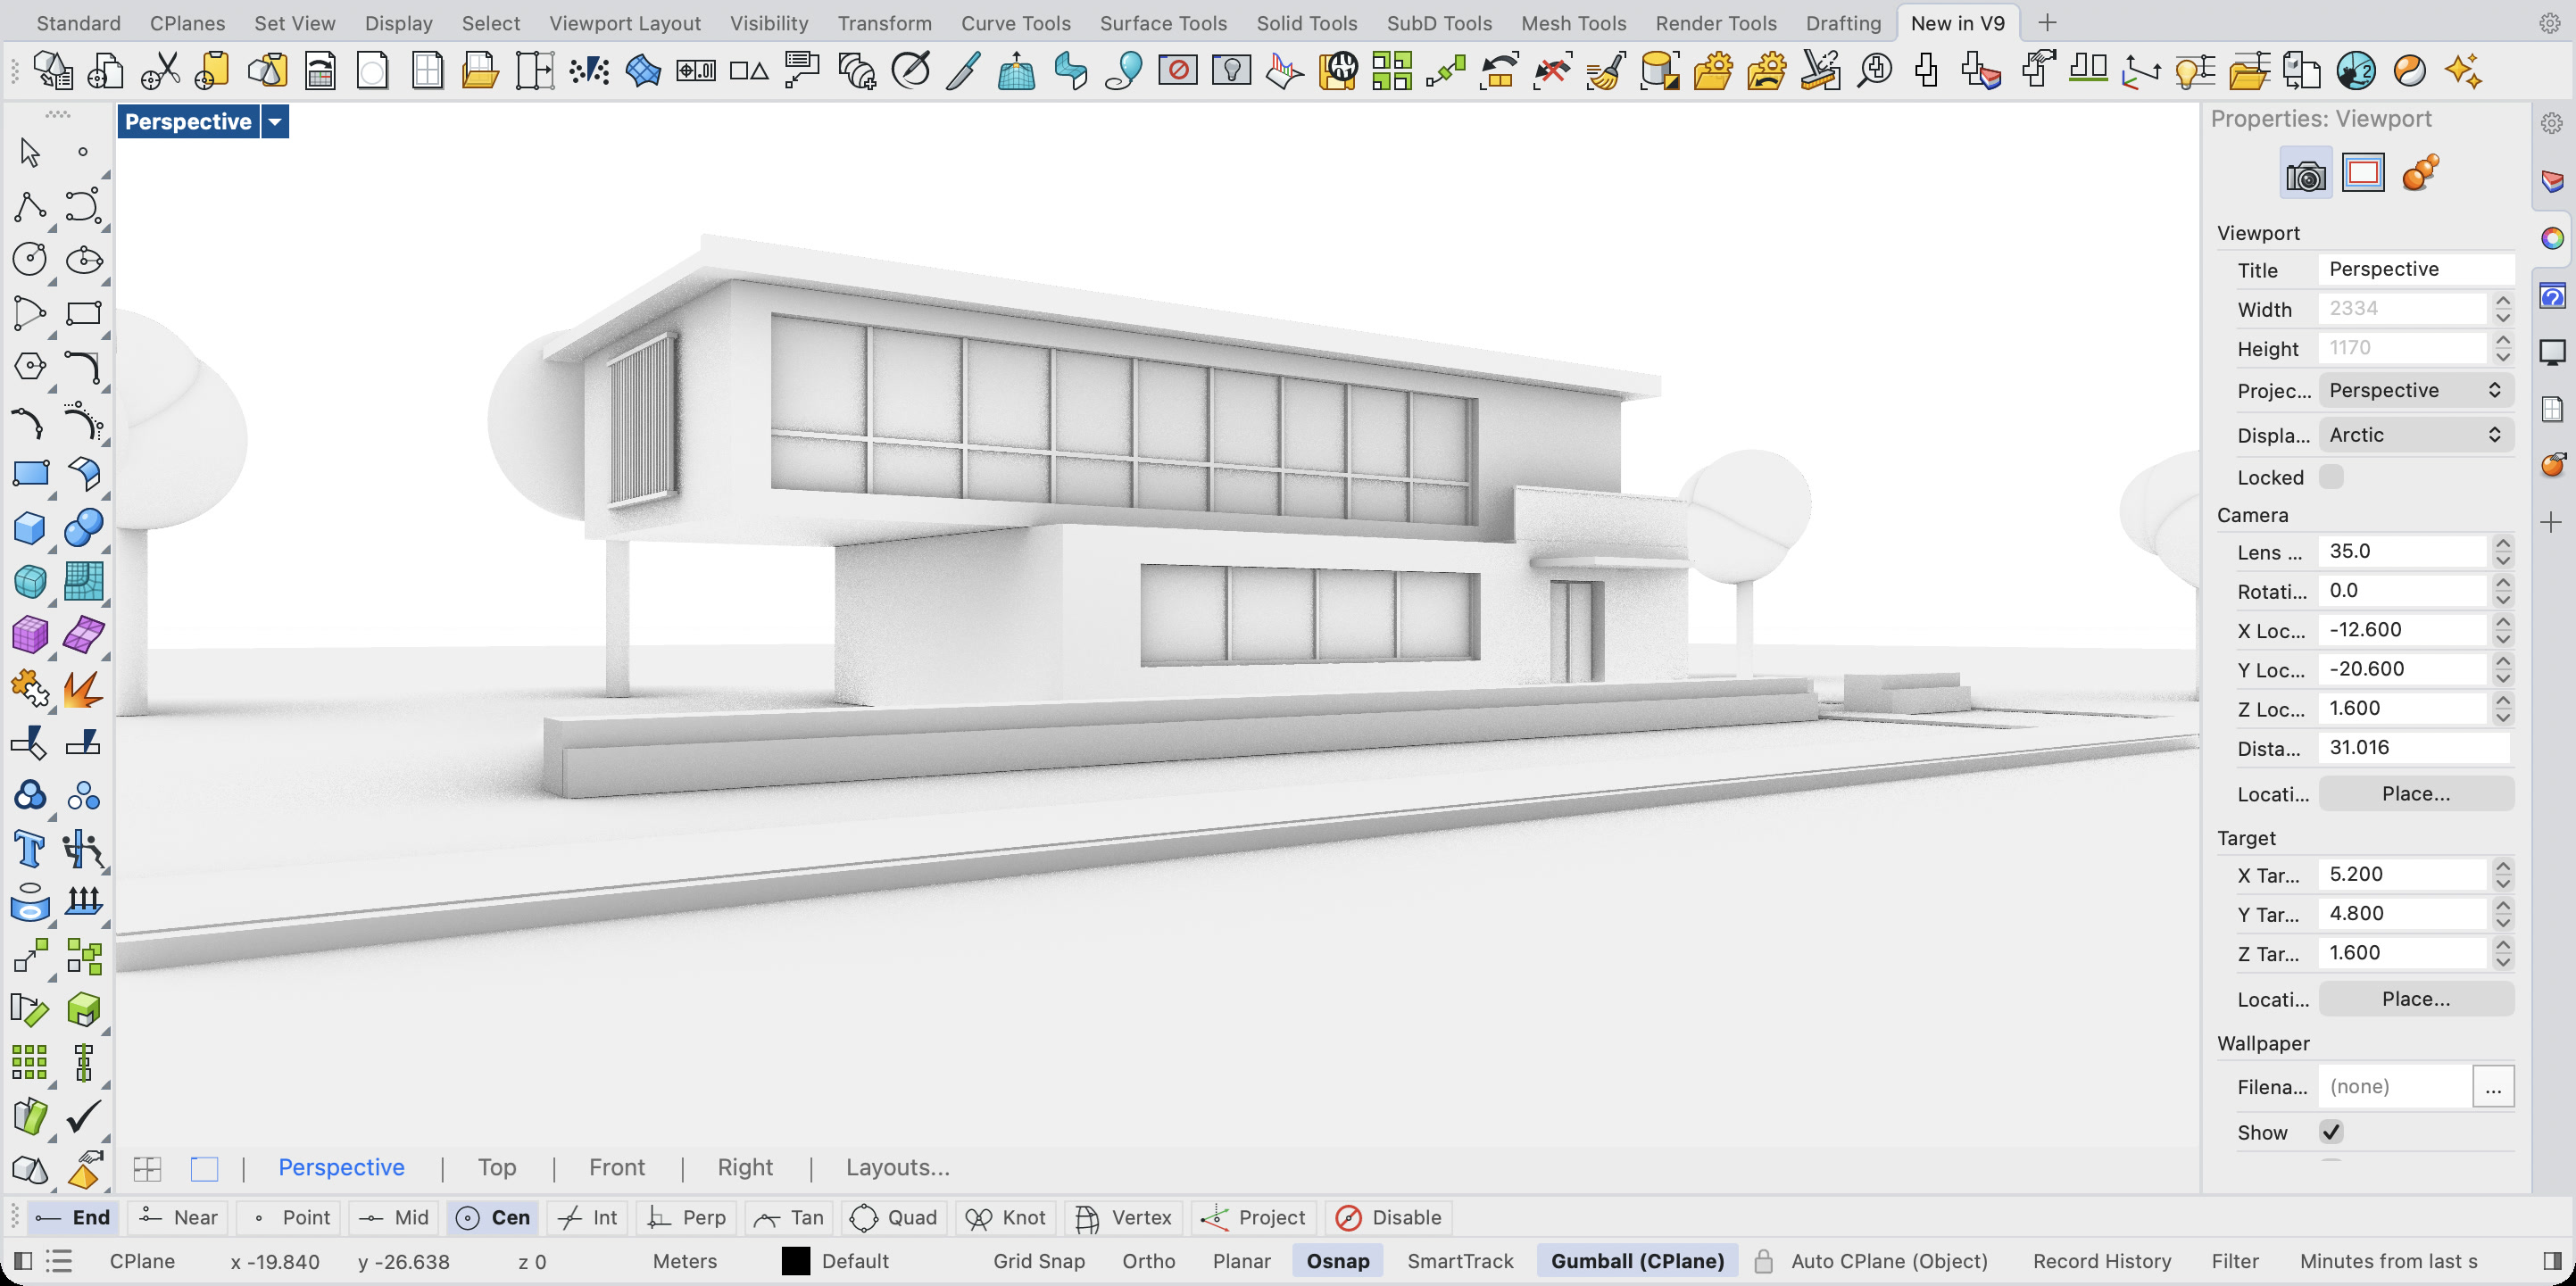
An AI render keeps the camera you give it, so the view is decided in Rhino, not in the AI. These settings gave the Lovspark team a street-level view that reads like a photograph:
- Keep verticals straight. Set Projection to Two-point perspective in the viewport properties, or put the camera and the target at the same height. We used 1.6 m for both.
- Pick the lens on purpose. McNeel calls 43 to 50 mm a "normal" lens for a 35 mm camera. We used 35 mm to fit the cantilever and the street.
- Stand on the ground, not off the board. A small site plane shows its edge and thickness, and Lovspark's AI reads that as a table-top model. A ground plane of a few hundred meters reaches the horizon.
- Move trees out of the way. Placeholder trees in front of the building hide the parts Lovspark needs to keep. Put them behind or beside it.
Step 2: choose the display mode the AI reads best
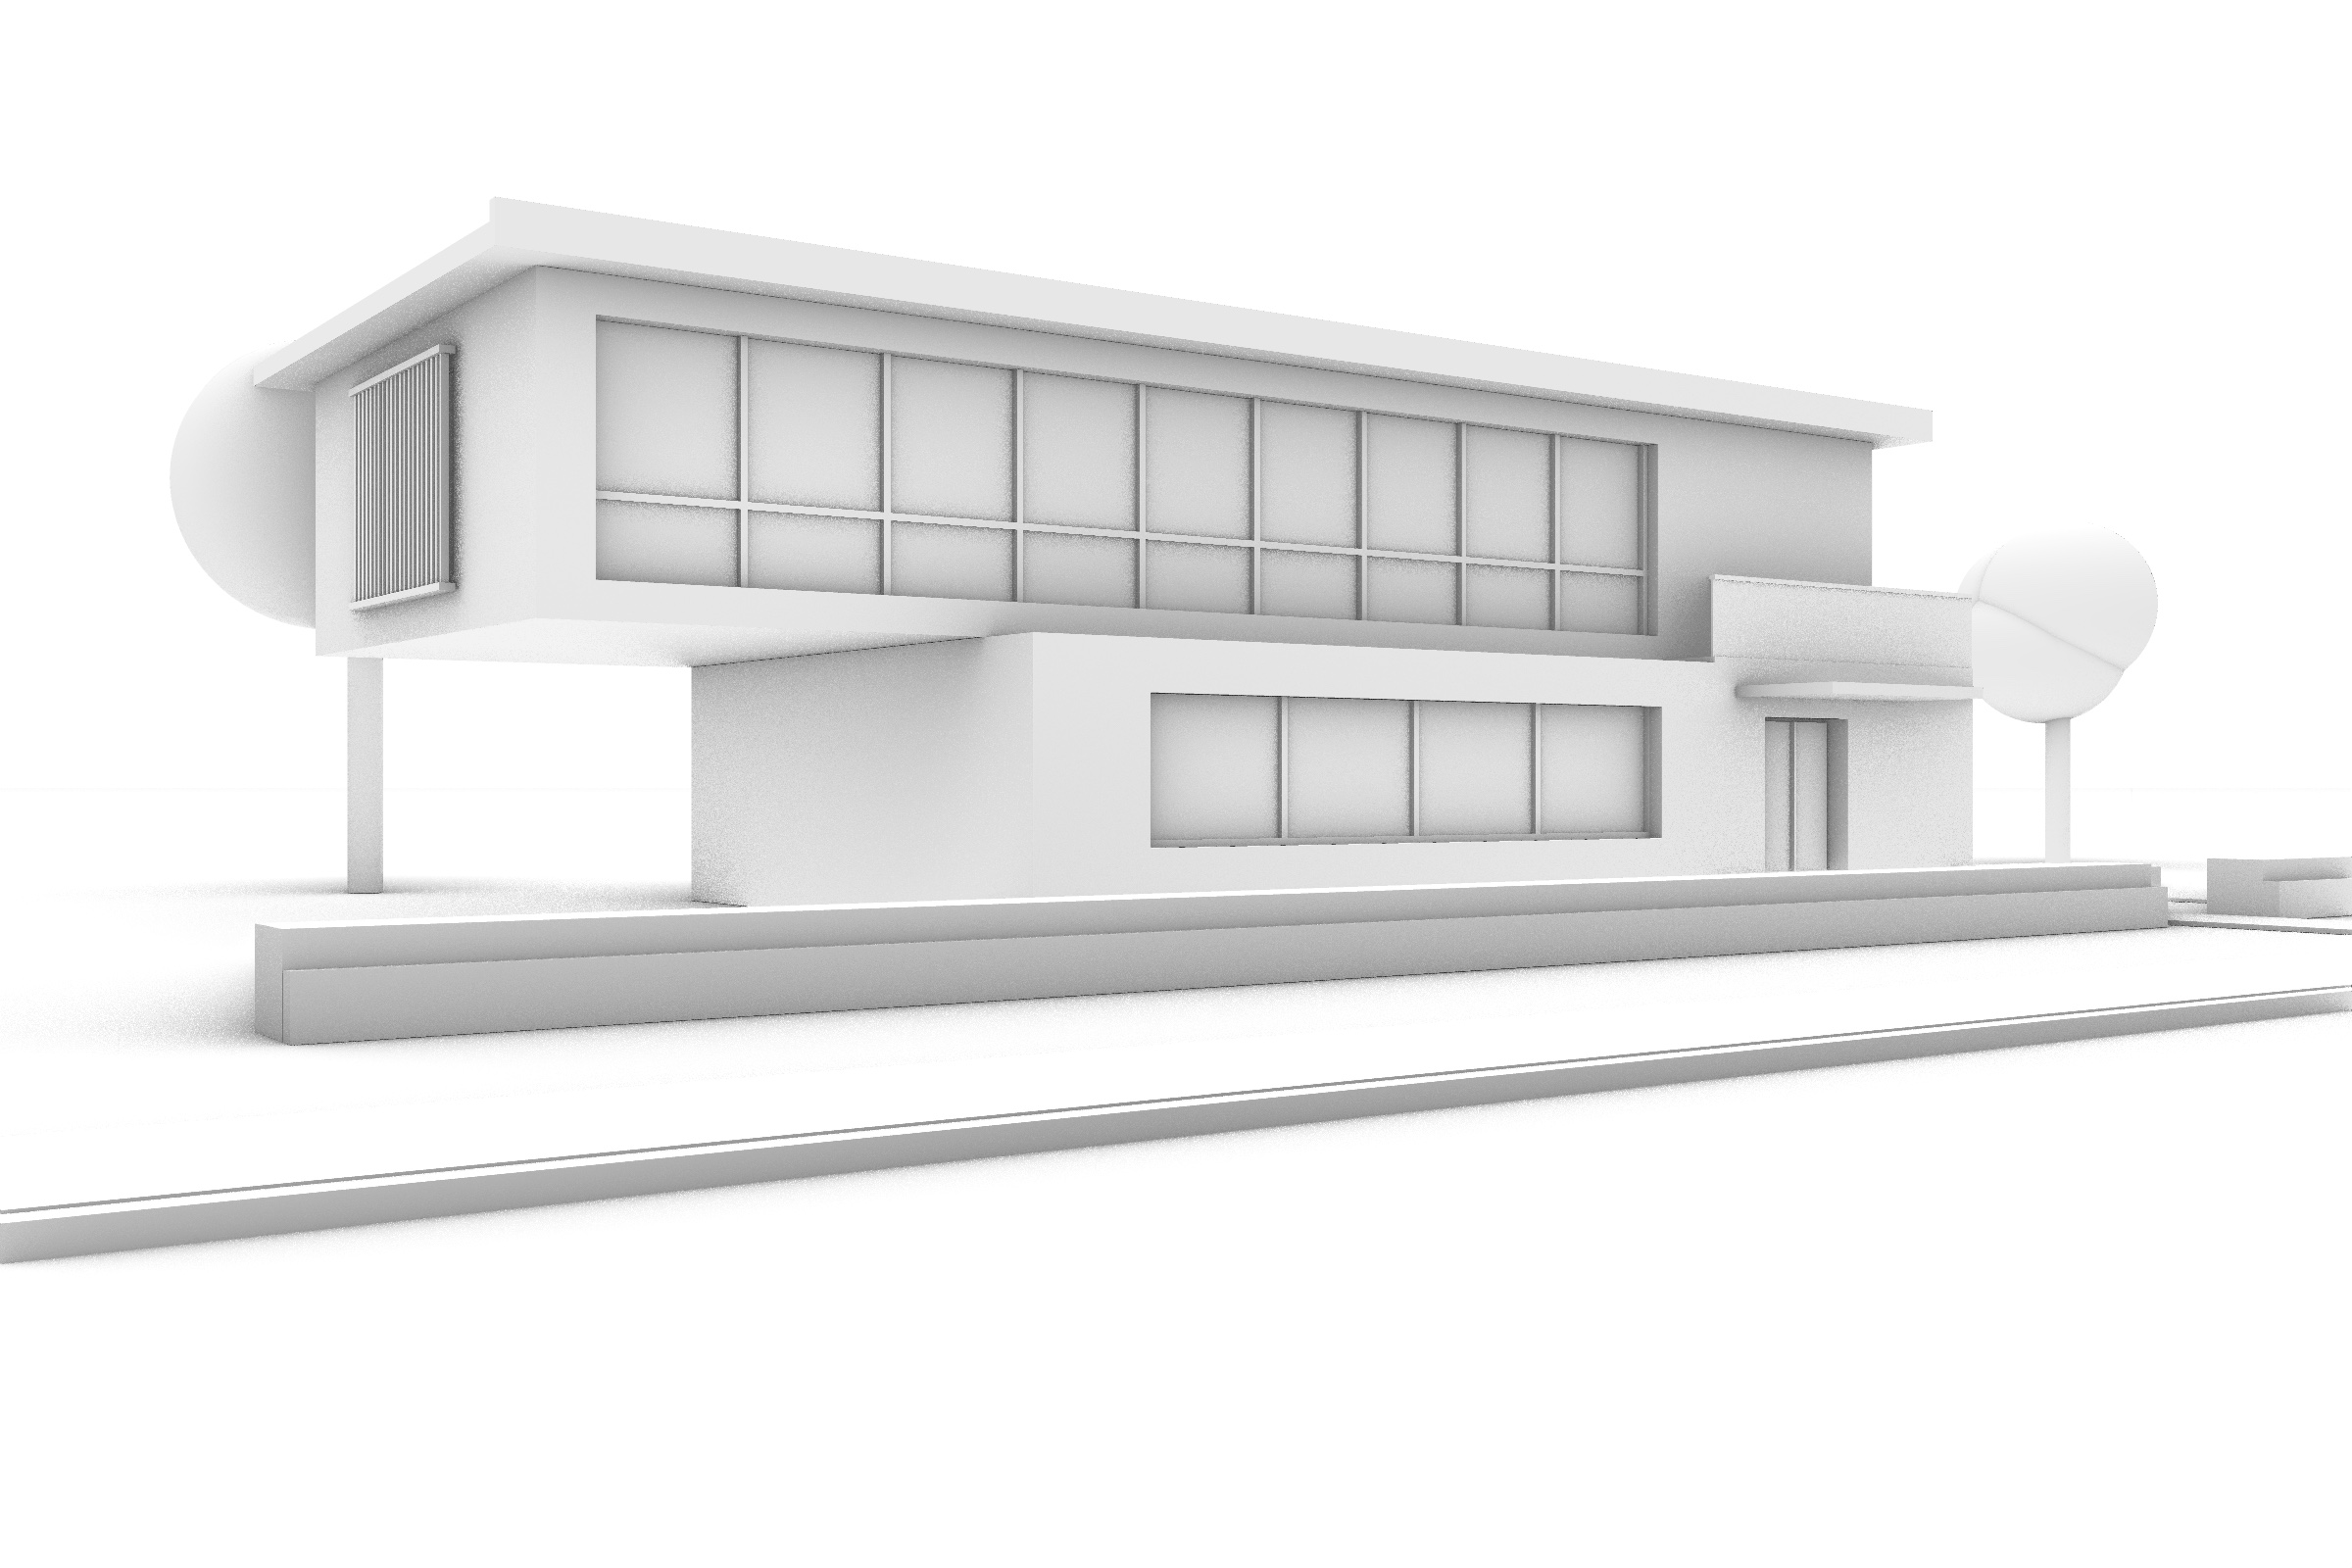
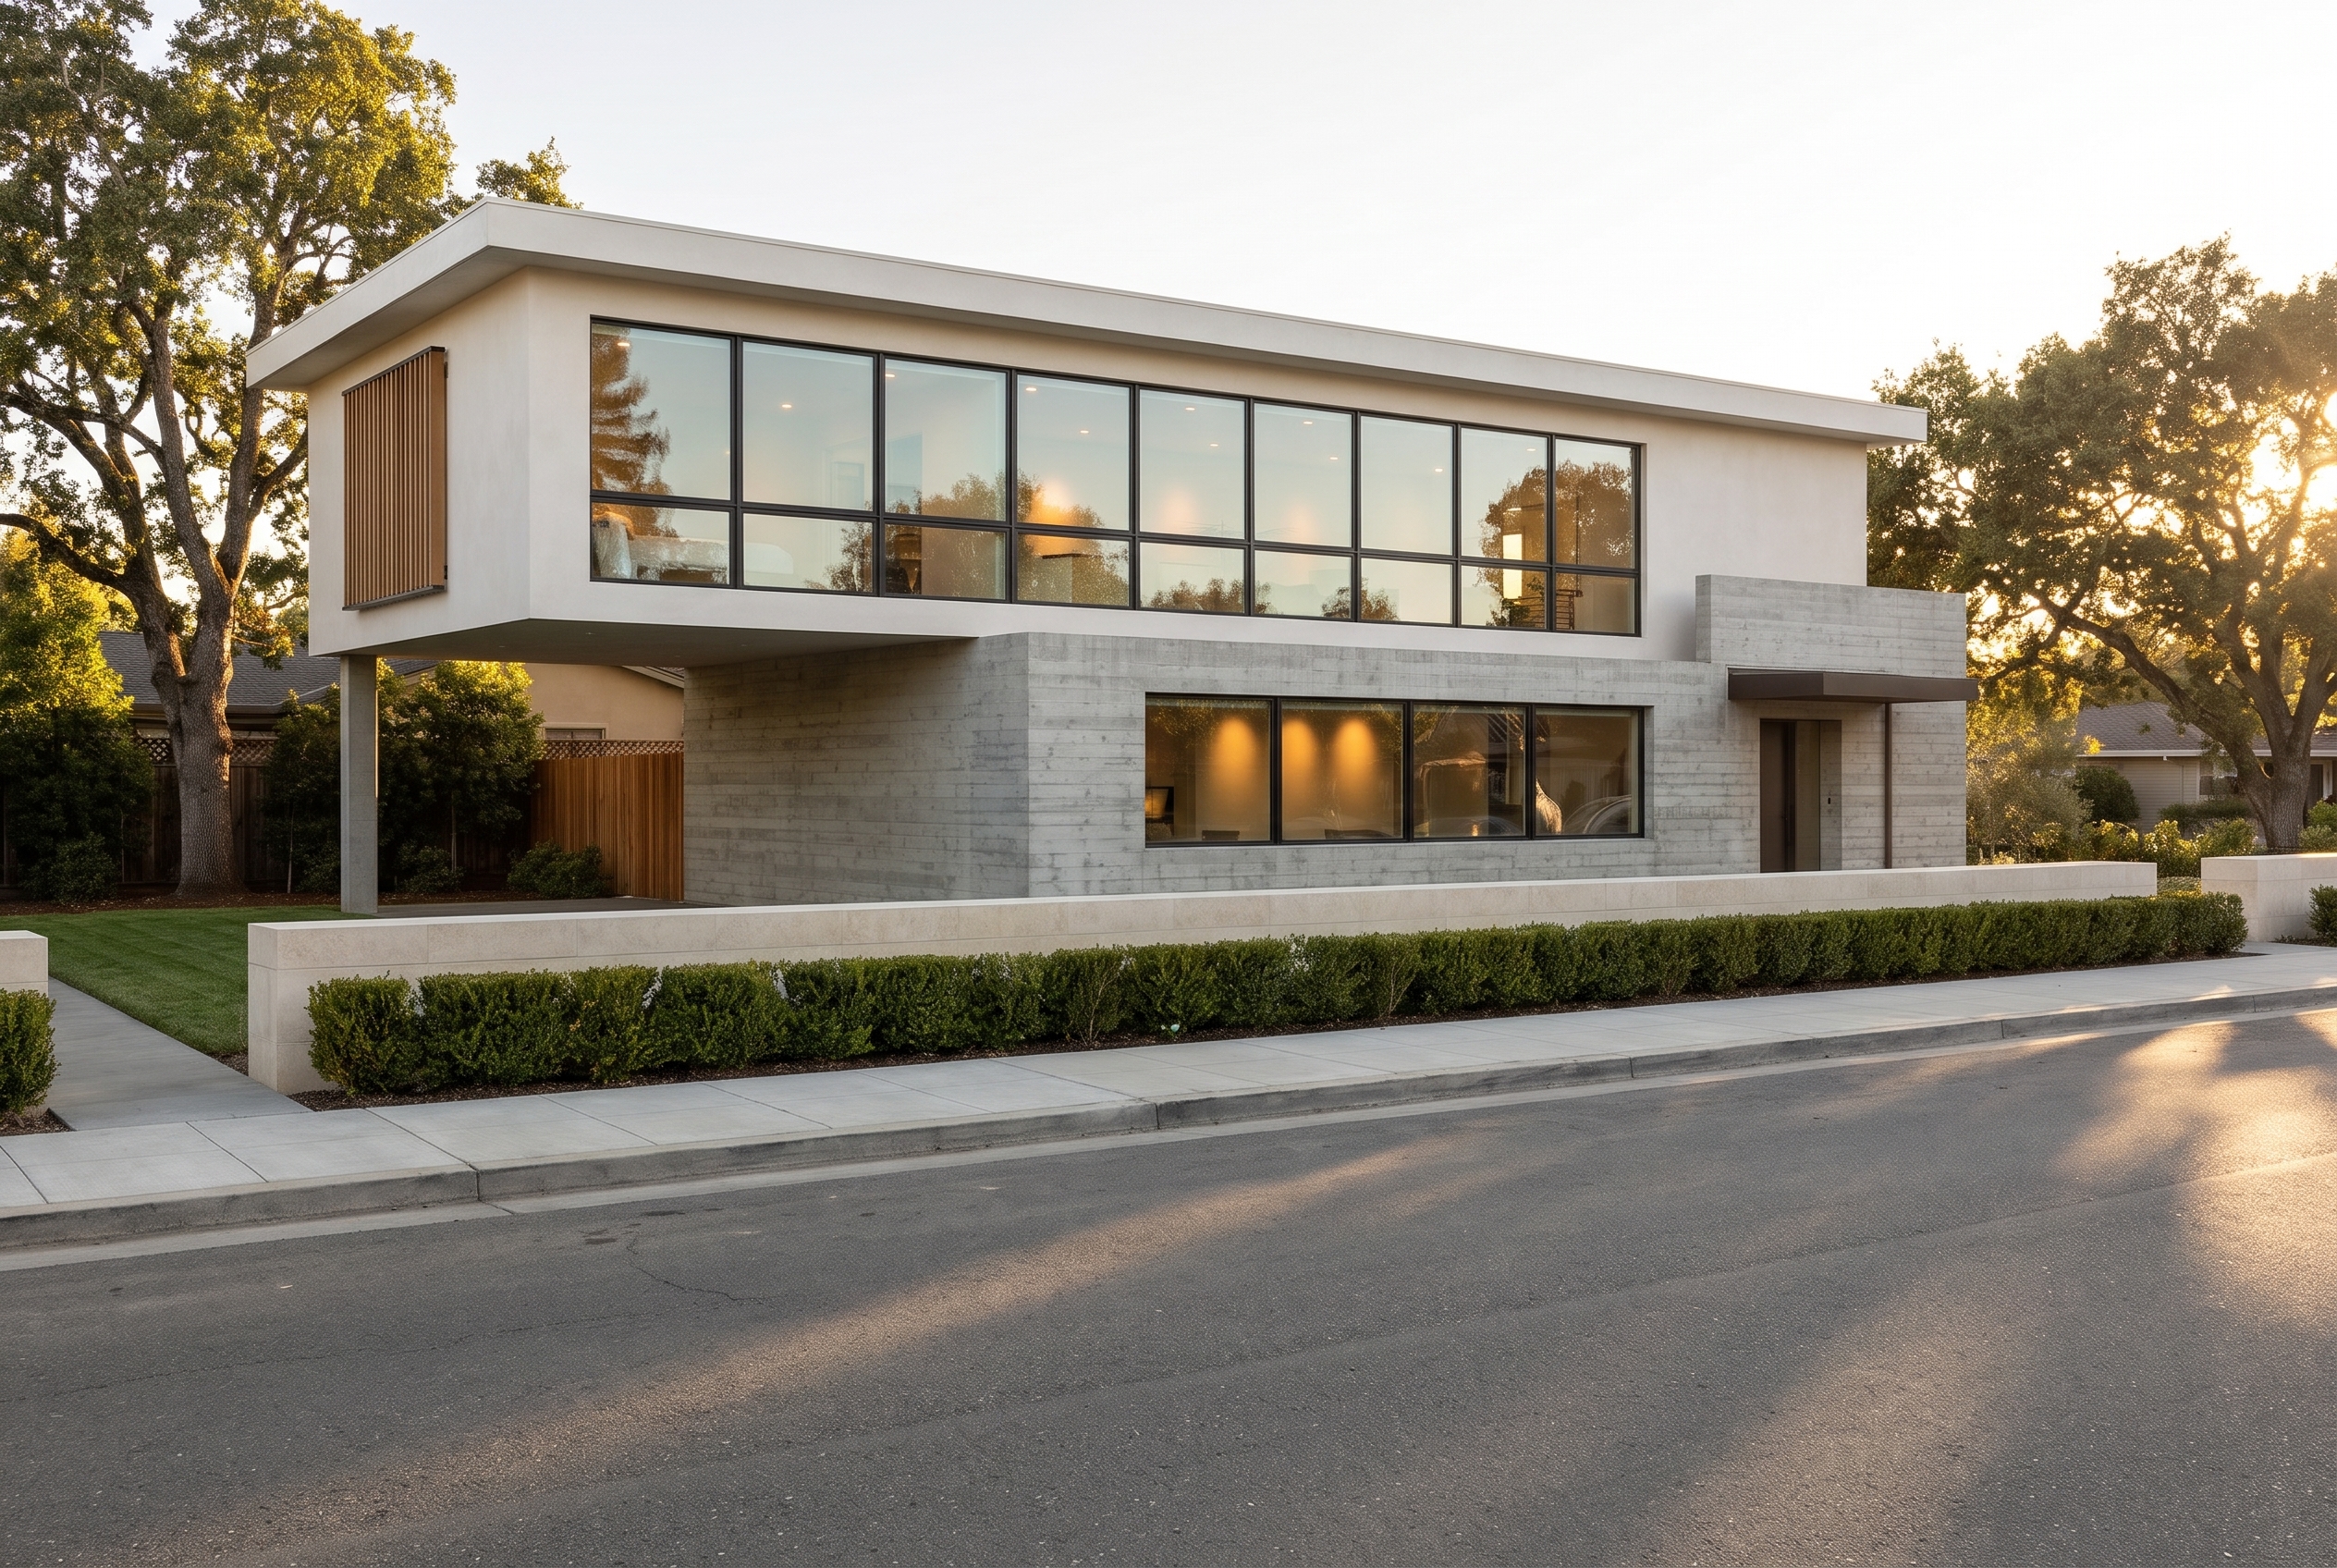
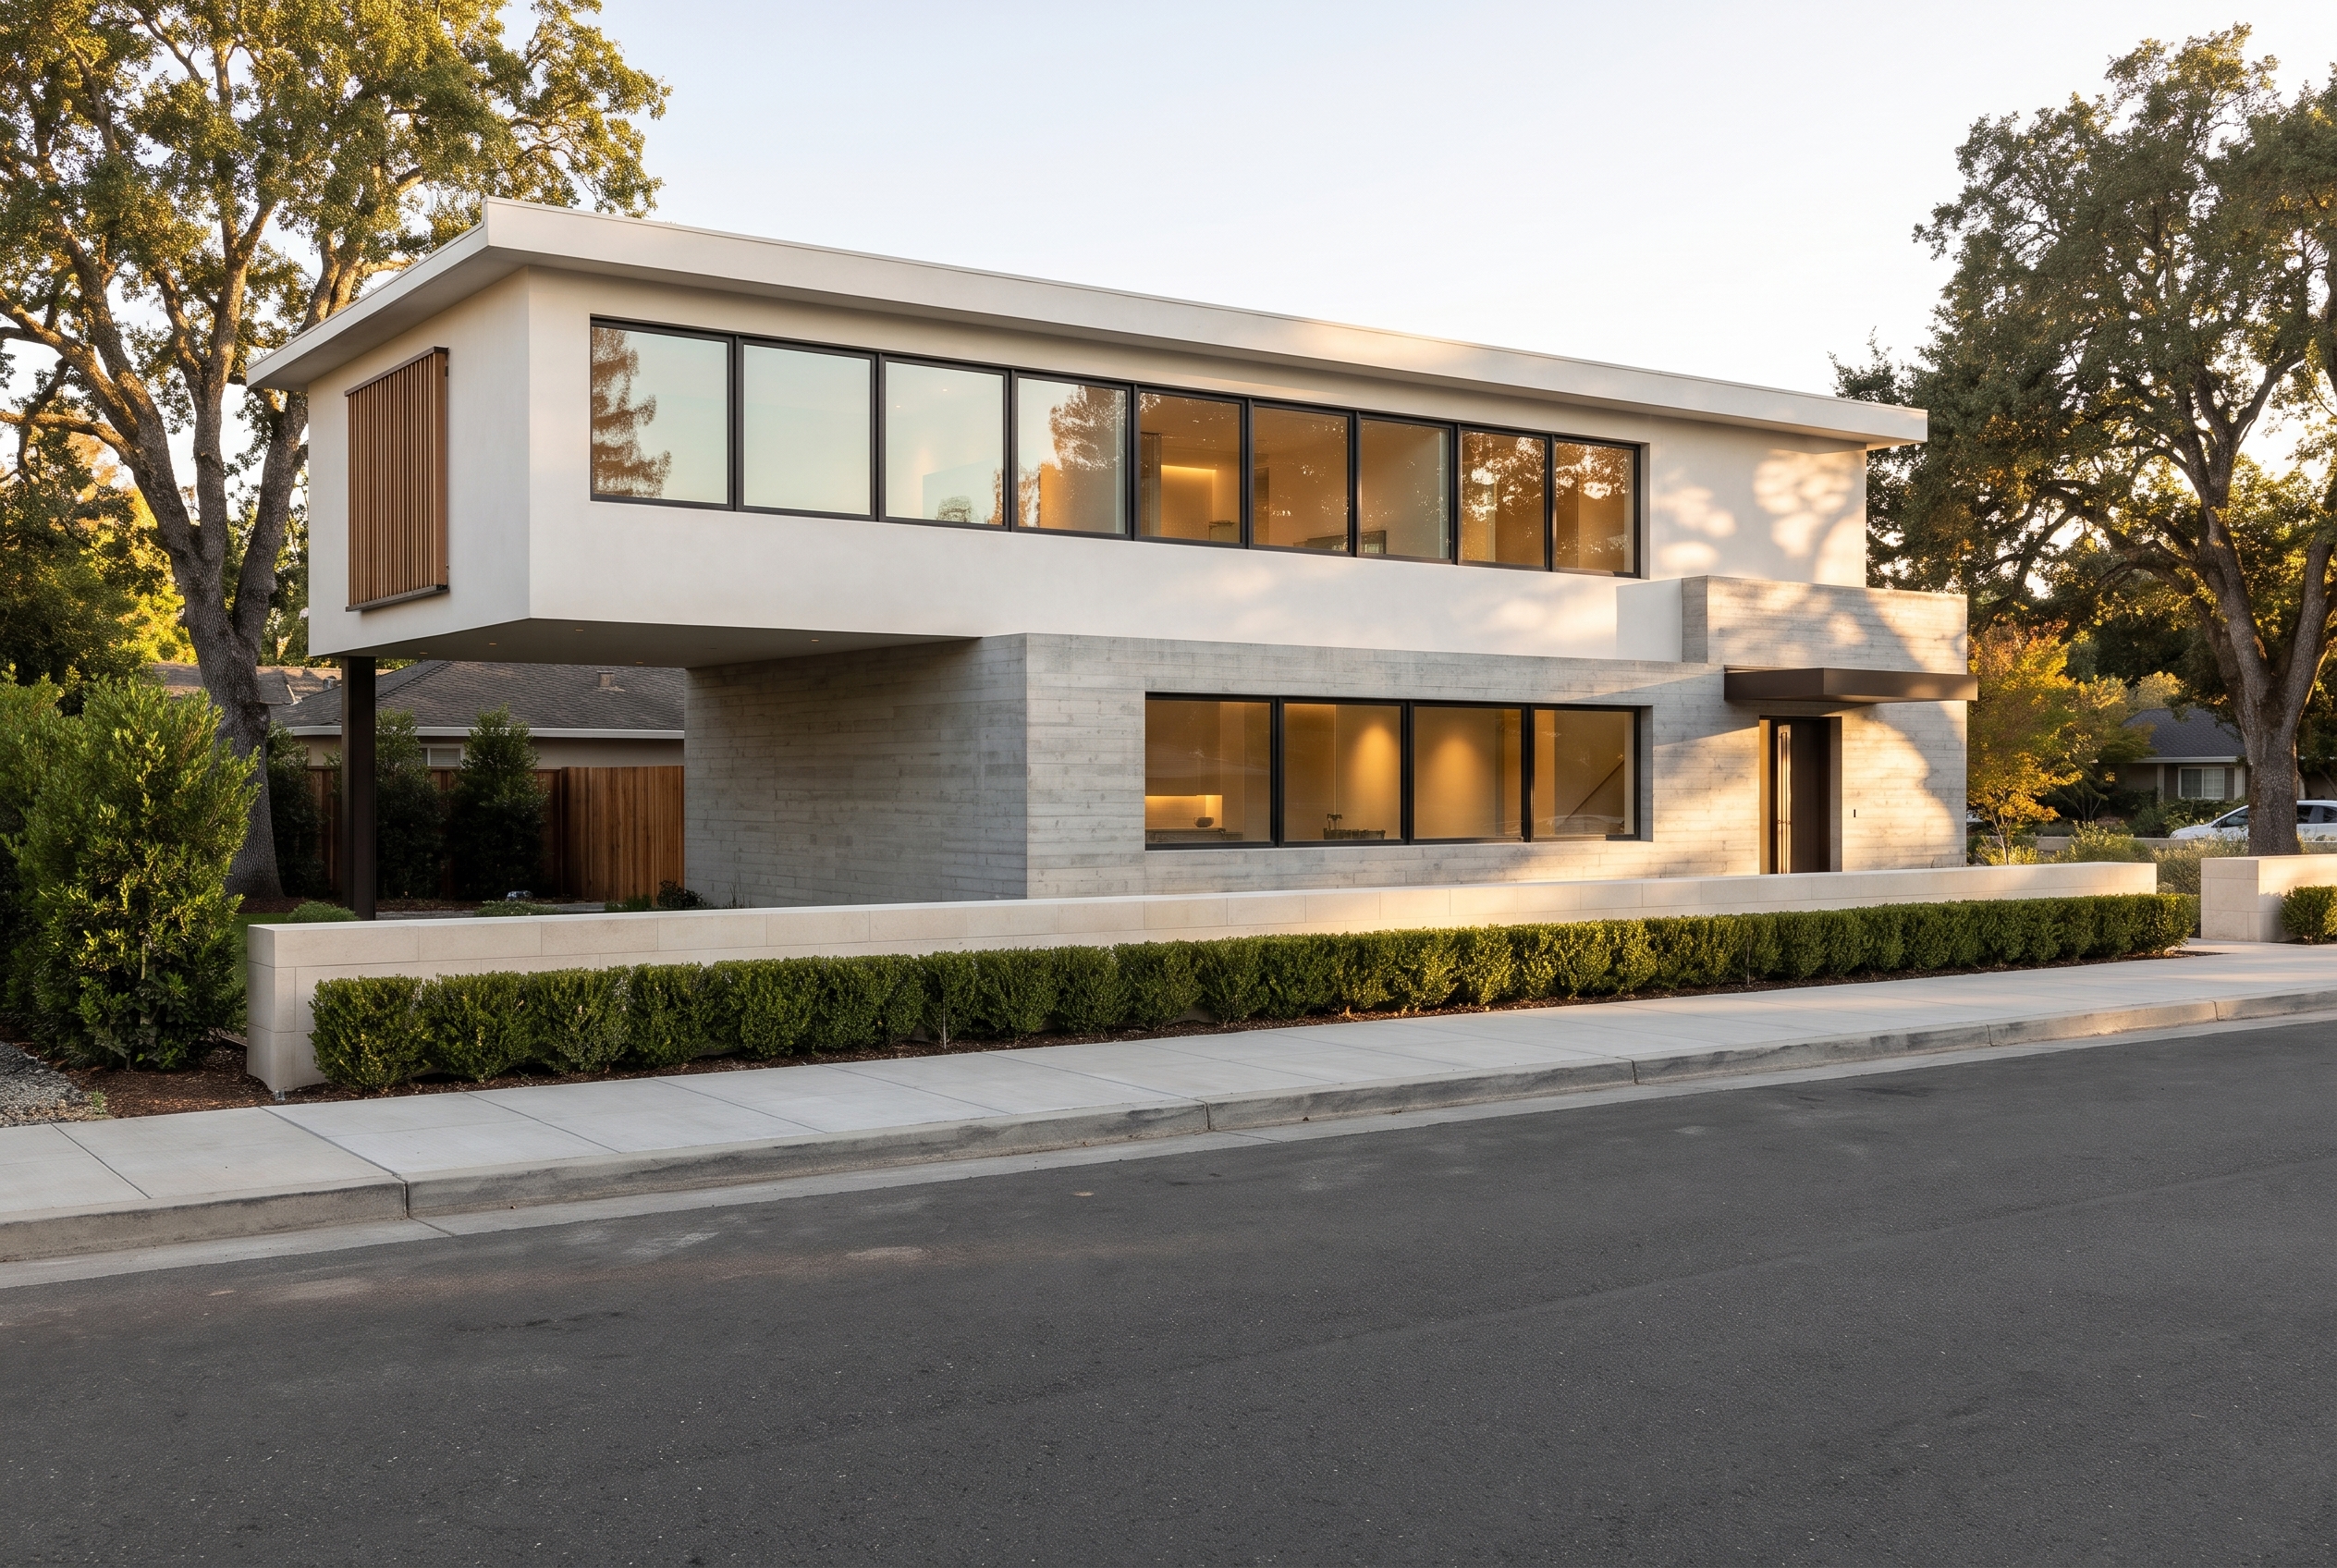
For this test the Lovspark team modeled one two-story house with a cantilevered upper floor, a mullion grid, a cedar slat screen and an entry canopy, then captured the same camera in four display modes. Each capture went to the AI with the same prompt: keep the geometry and camera, white stucco and board-formed concrete, golden-hour light on a Northern California street.
Only the input changed. Here is what came back.
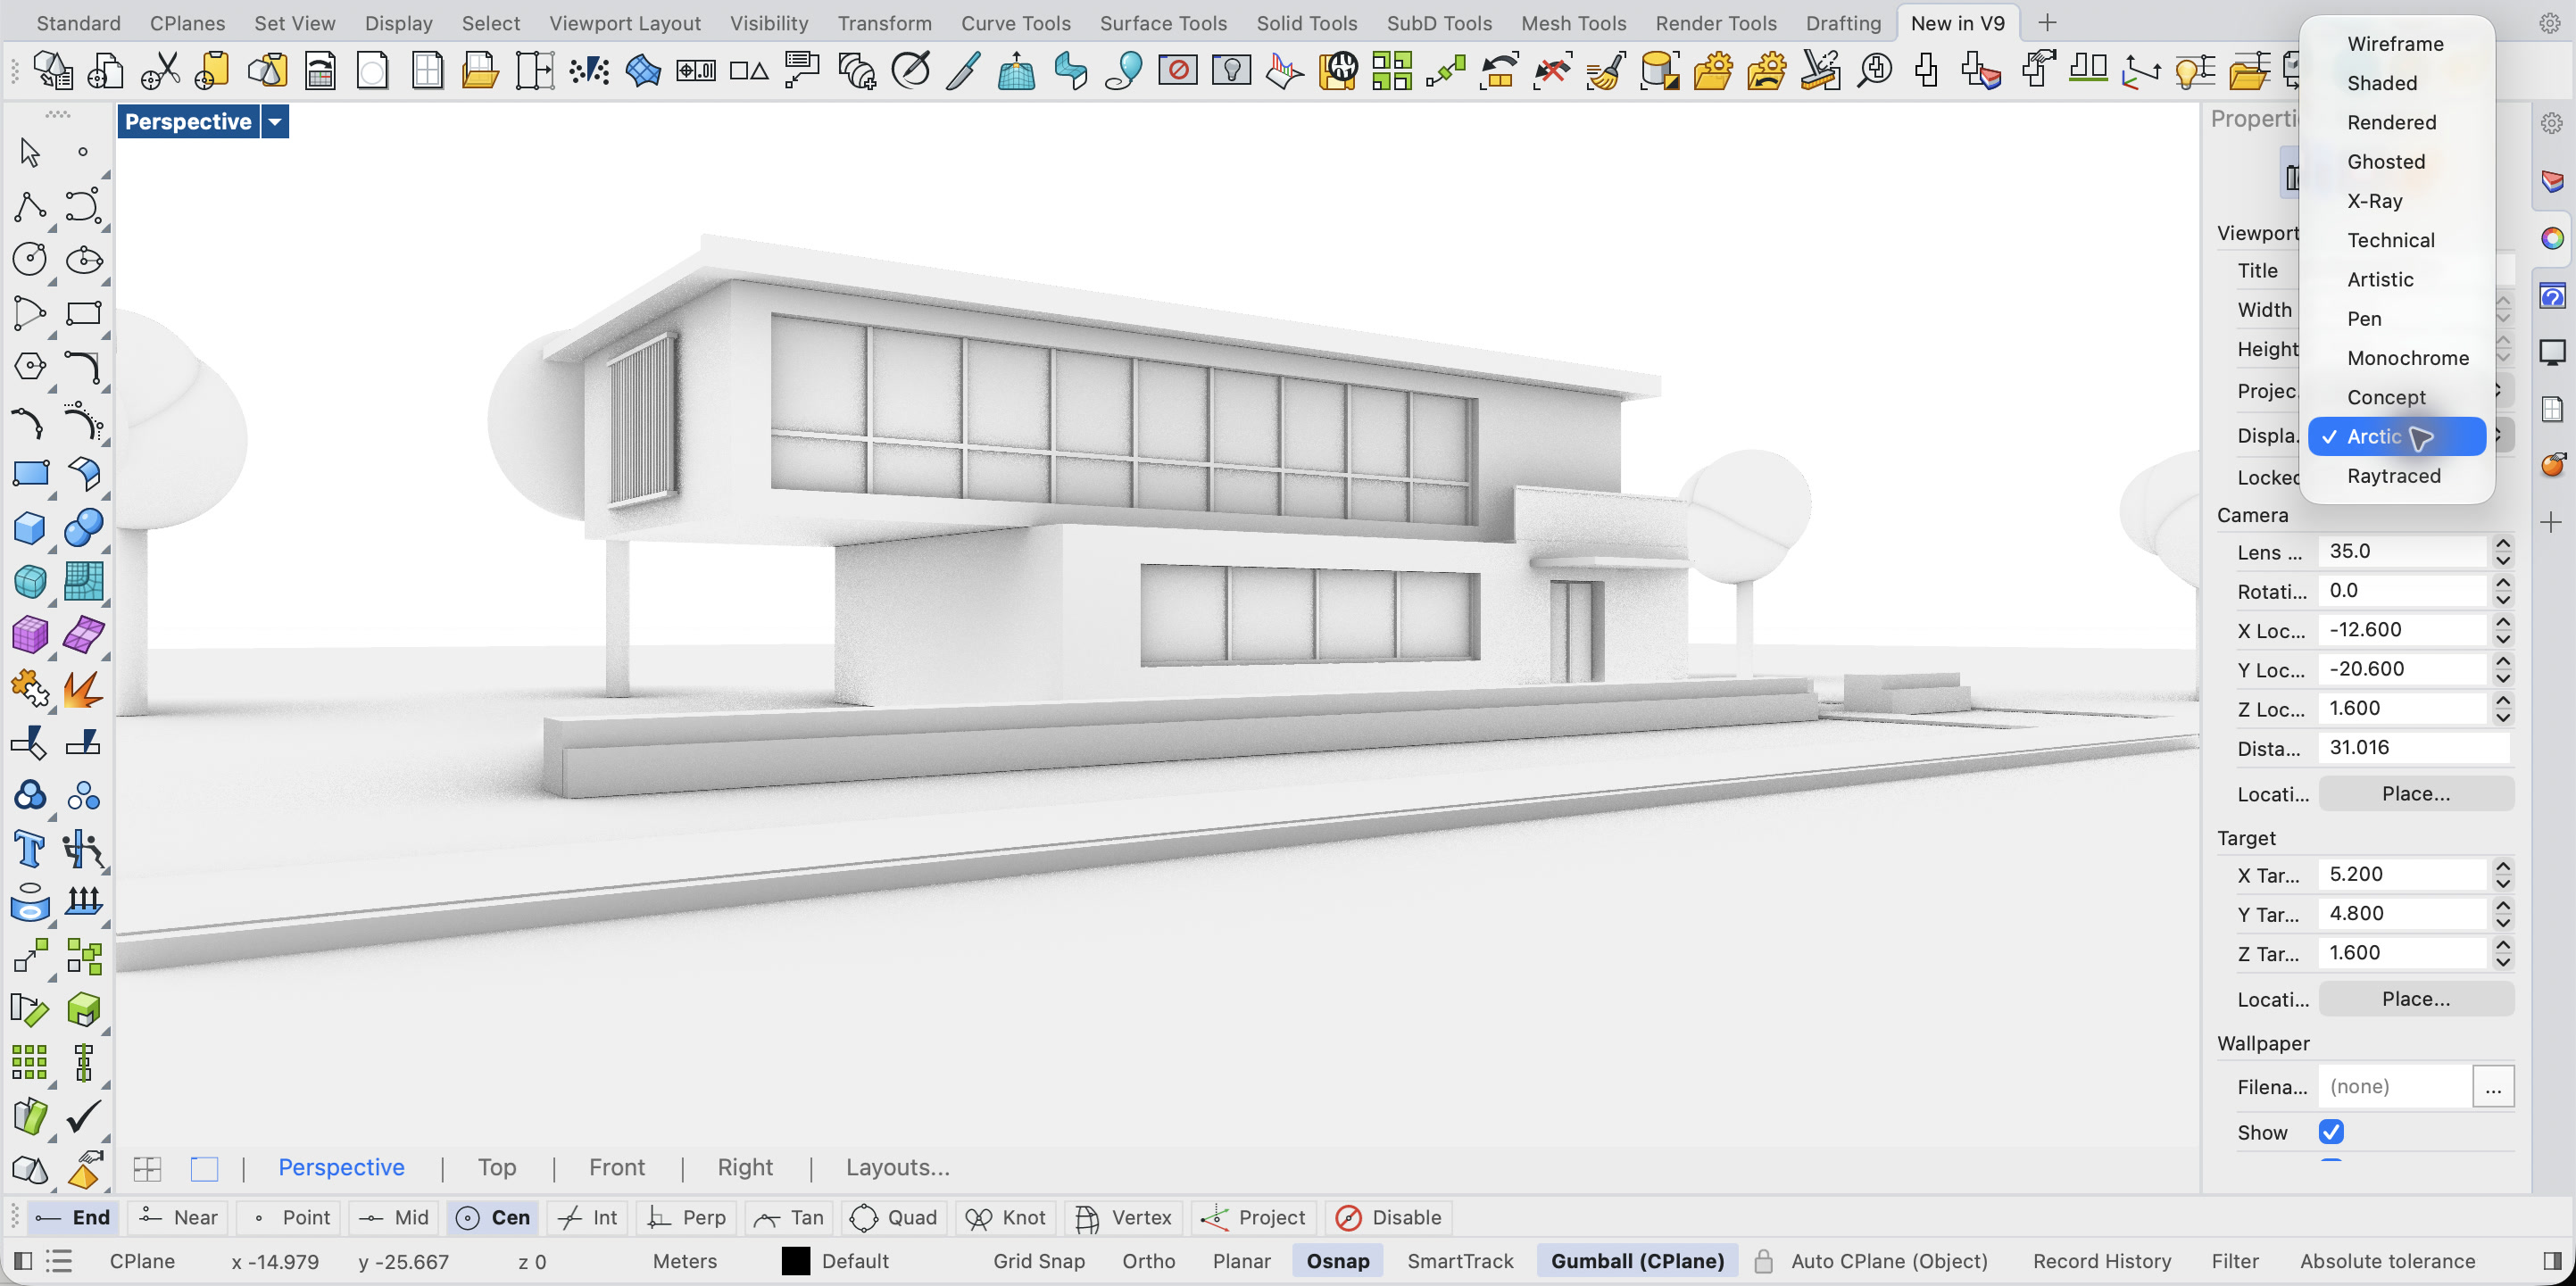
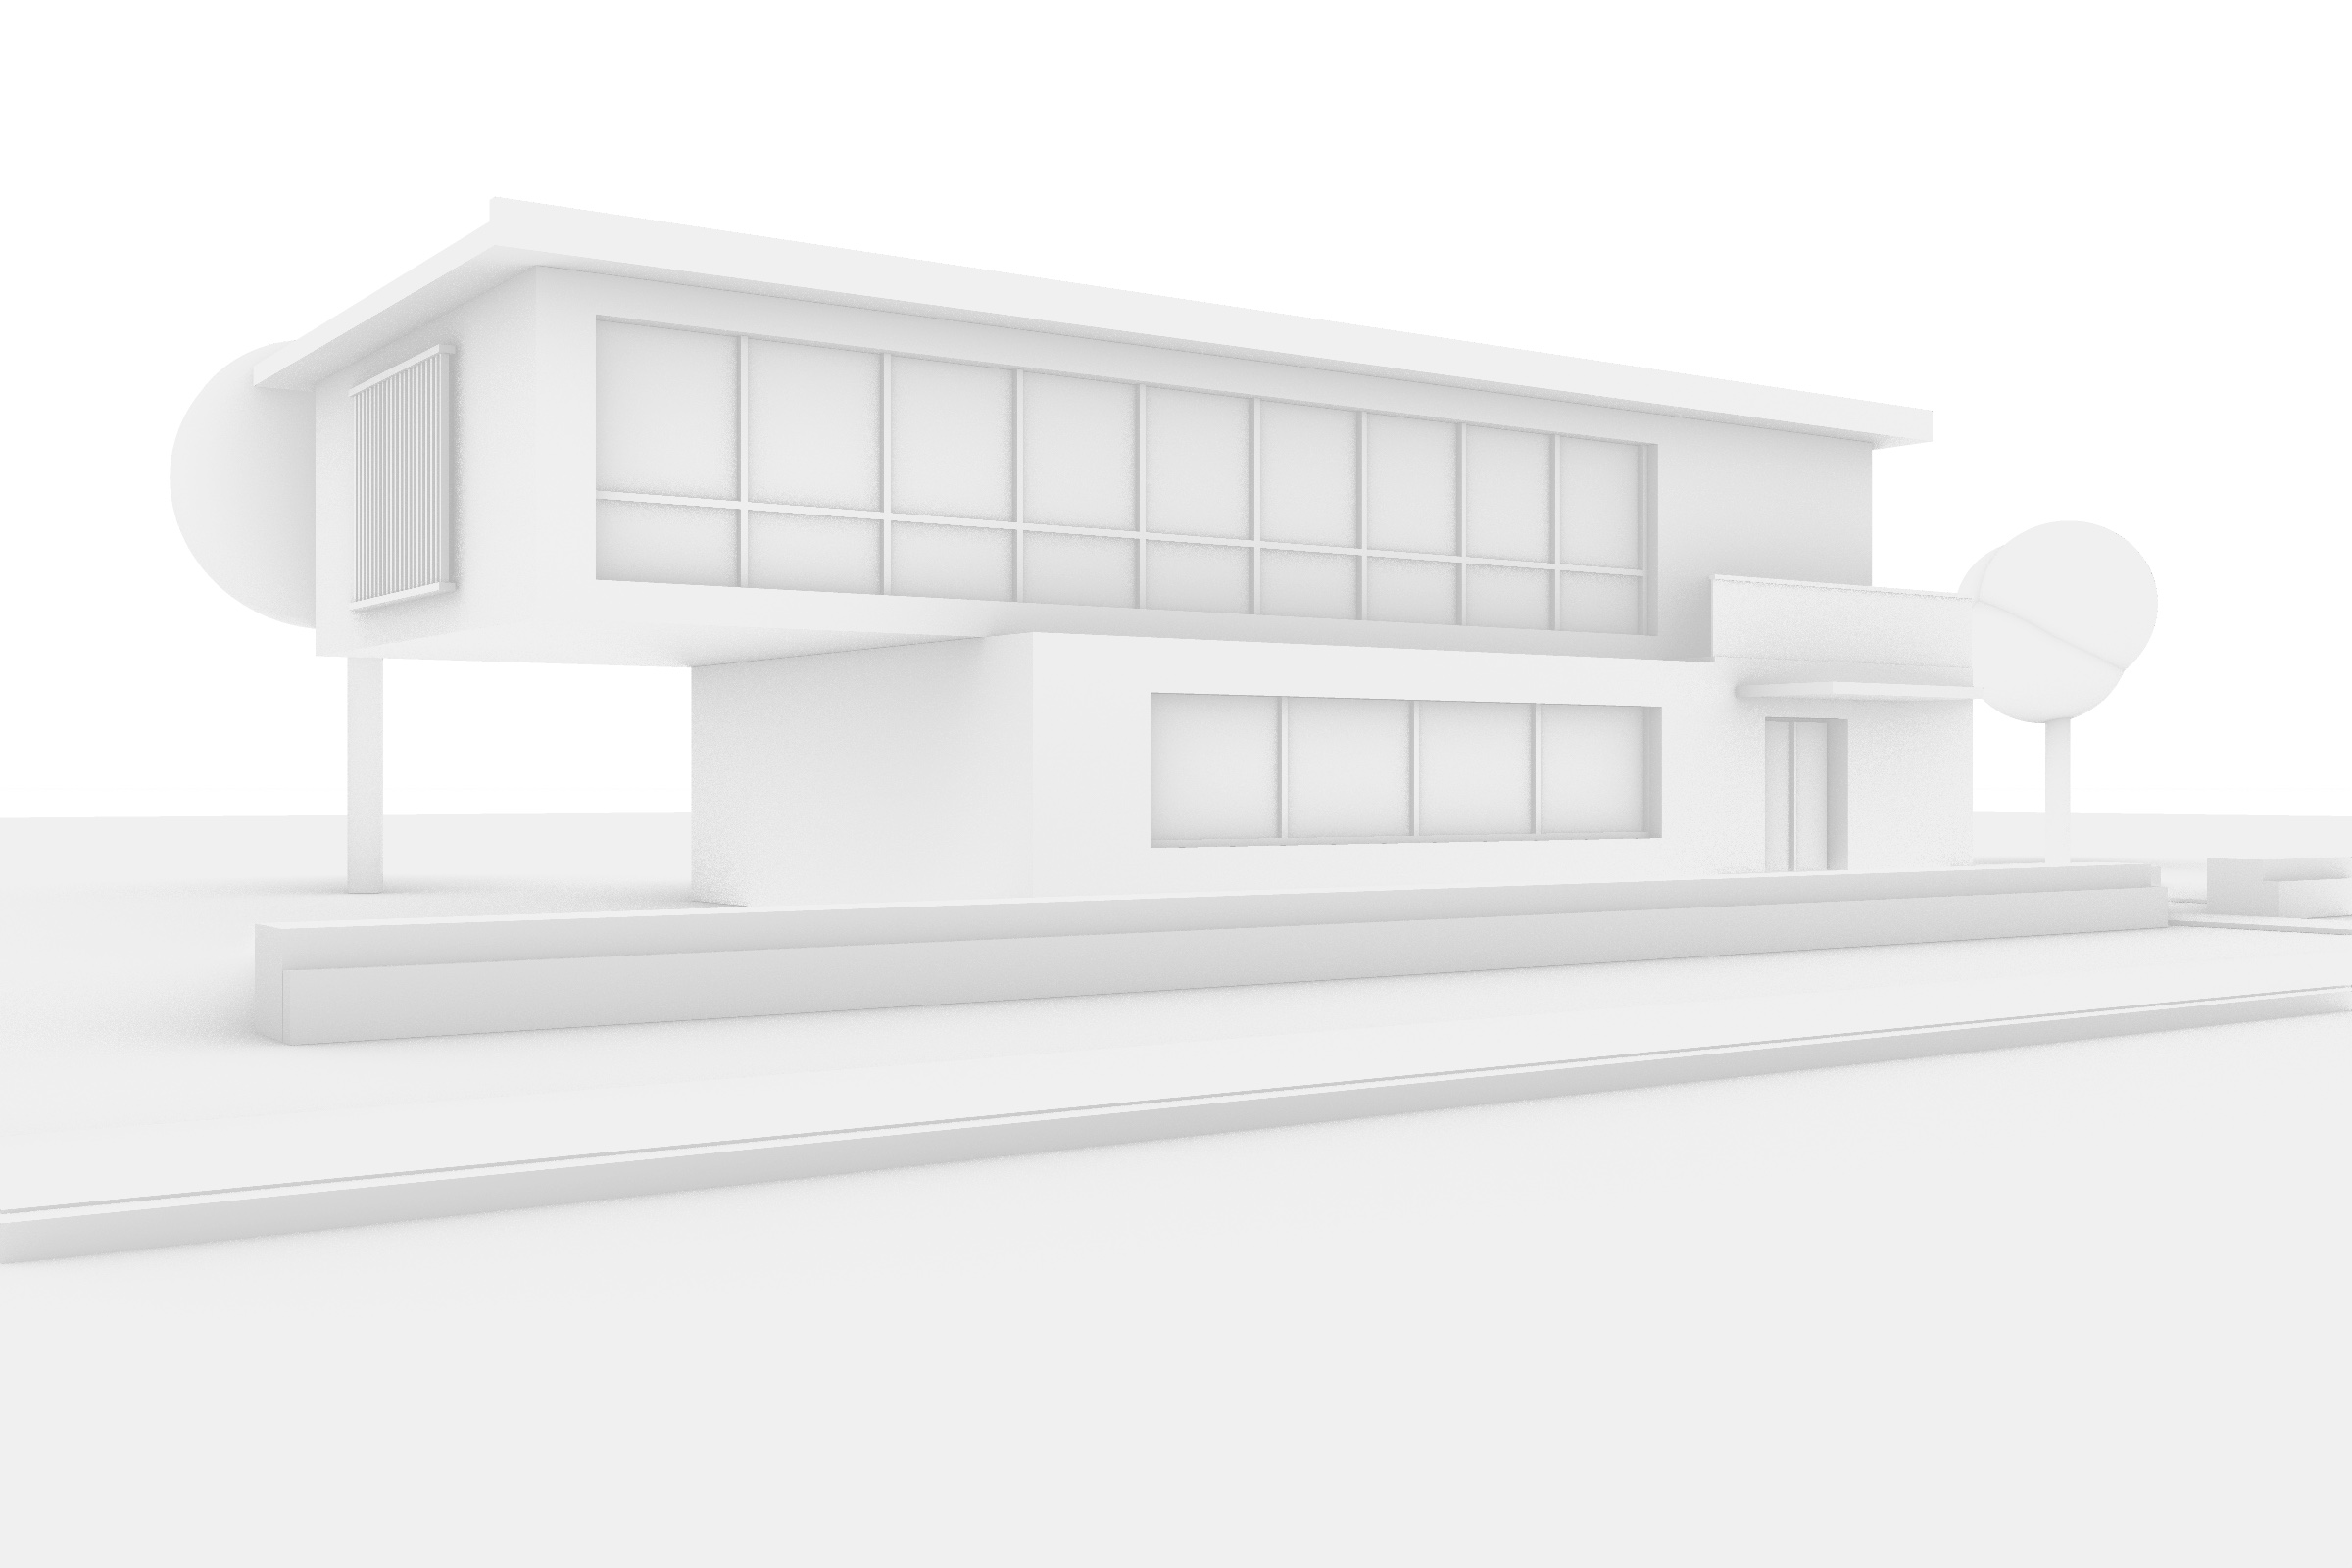
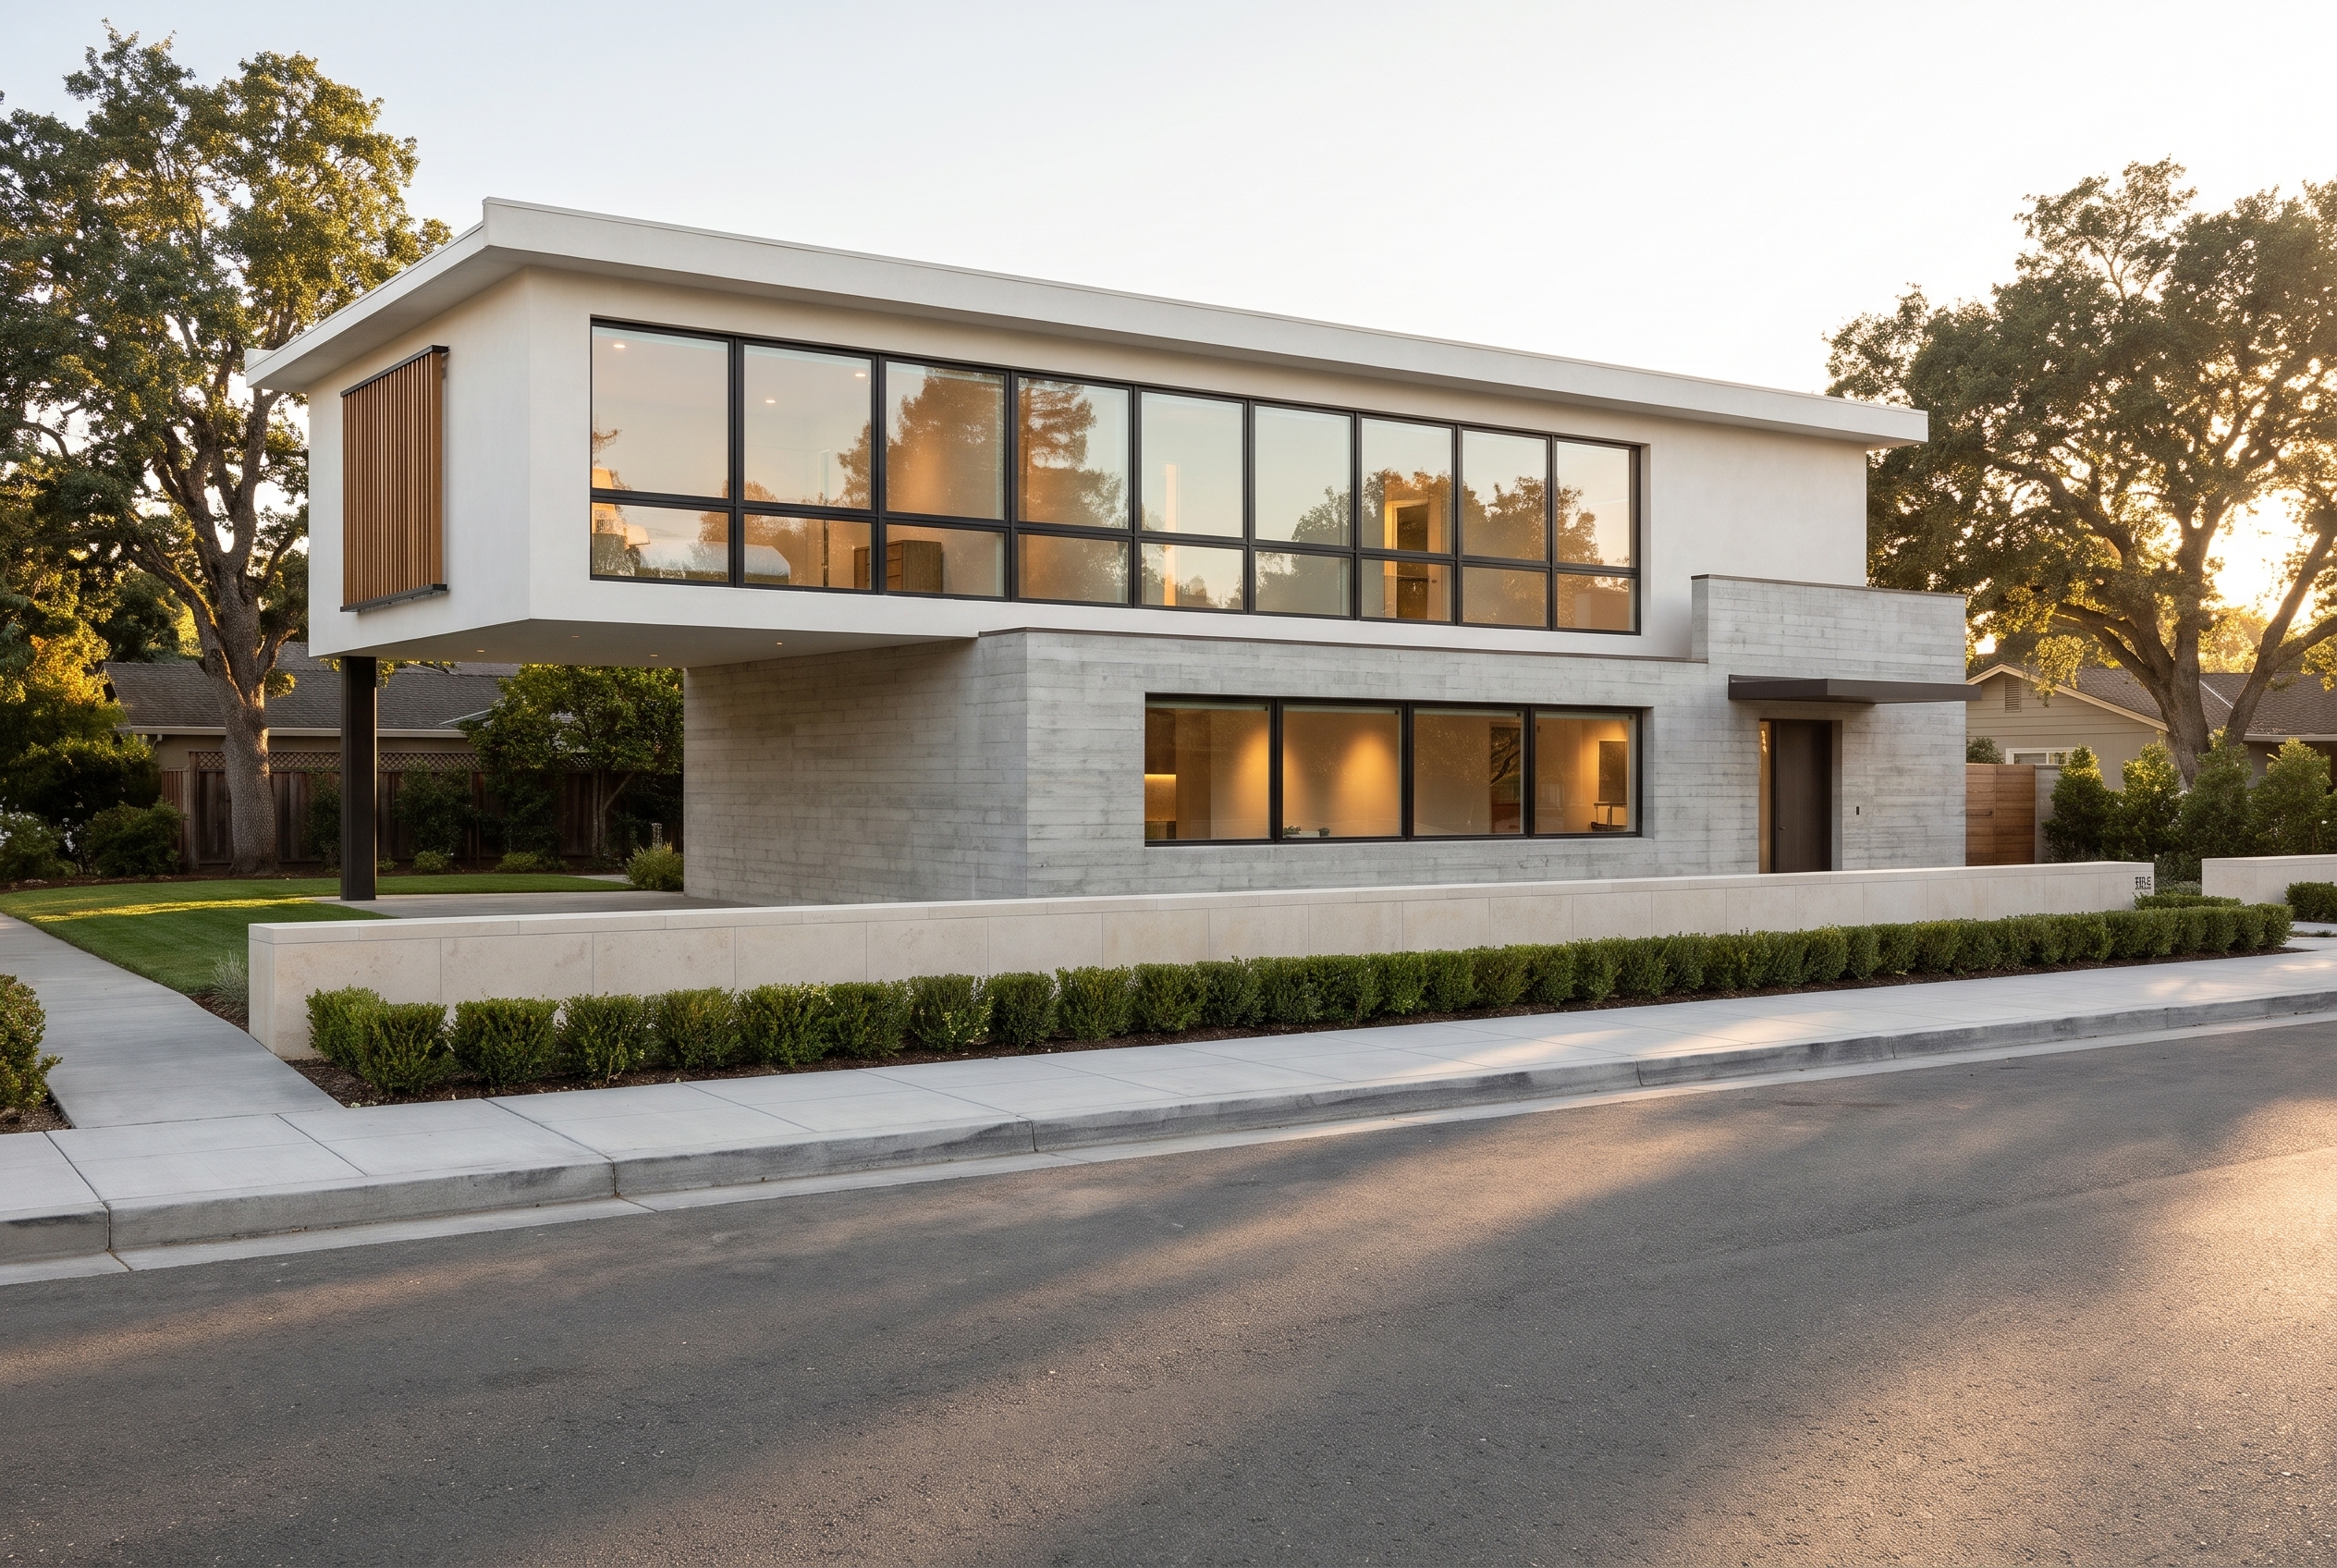
Arctic: Lovspark's AI kept the mullion grid with its horizontal transom, the four-bay lower window, the canopy, the slat screen and the garden wall.
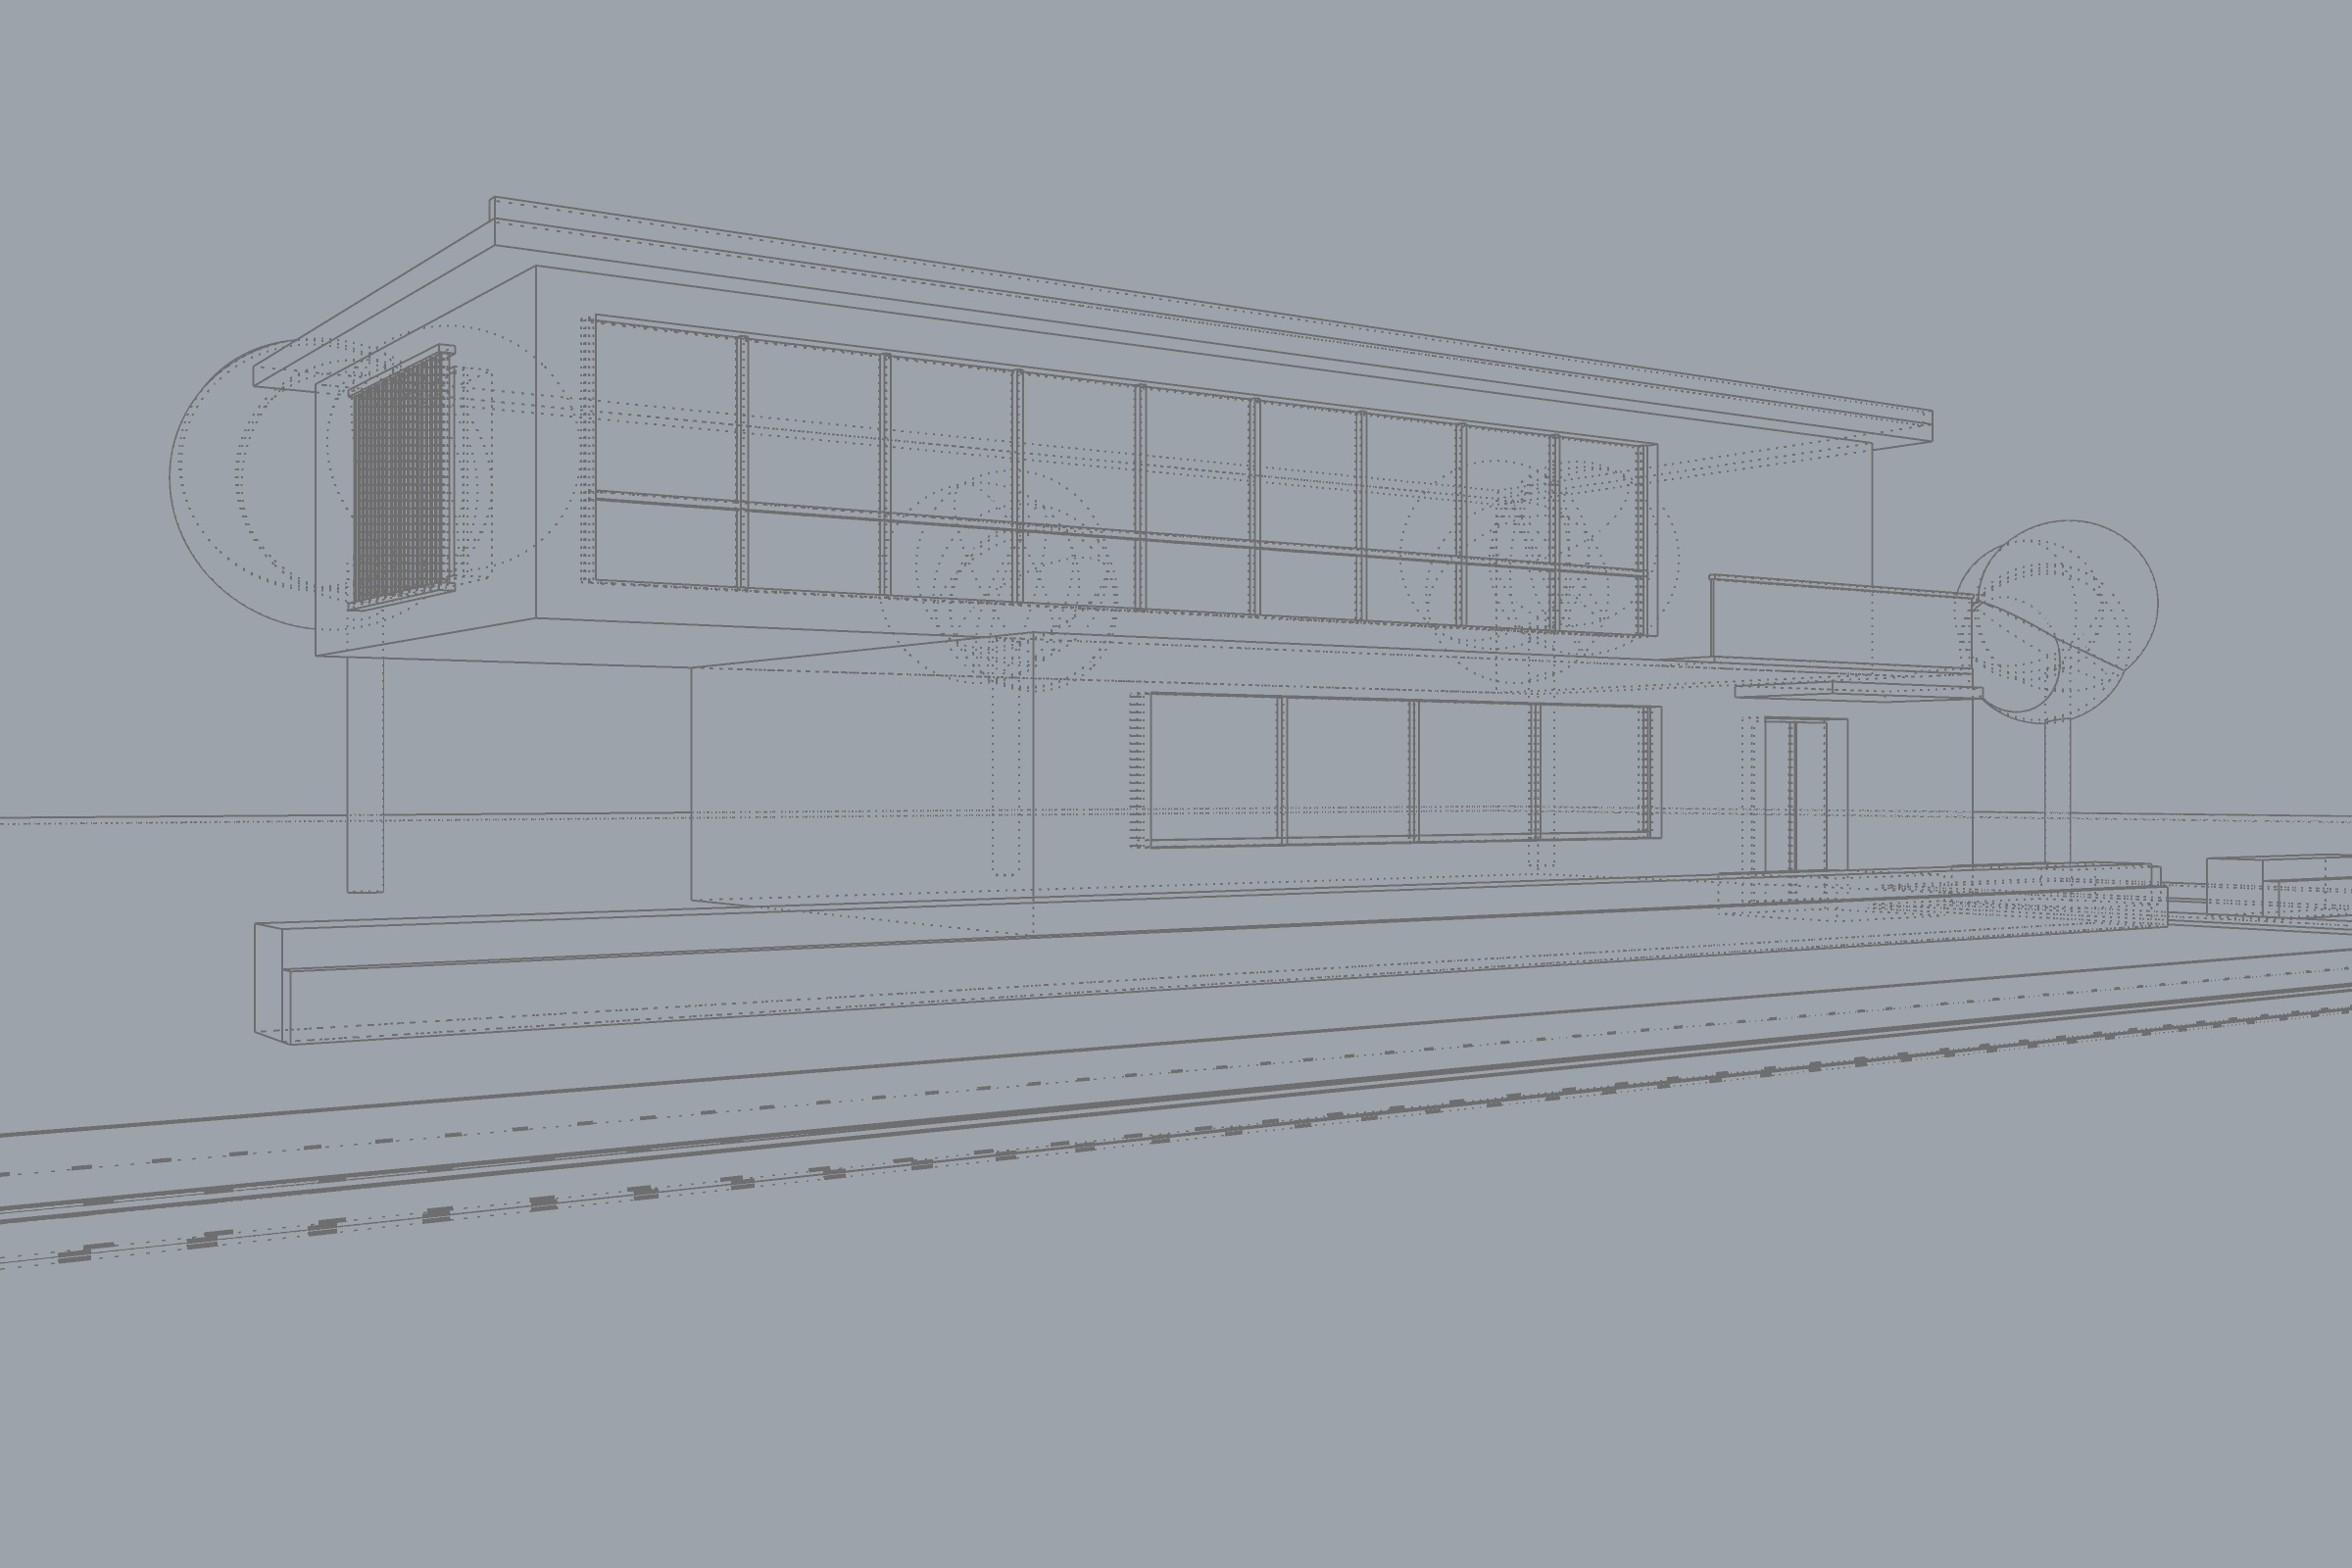
Technical: the transom survived and the dotted hidden lines did not confuse Lovspark's AI; the upper window lost one bay.
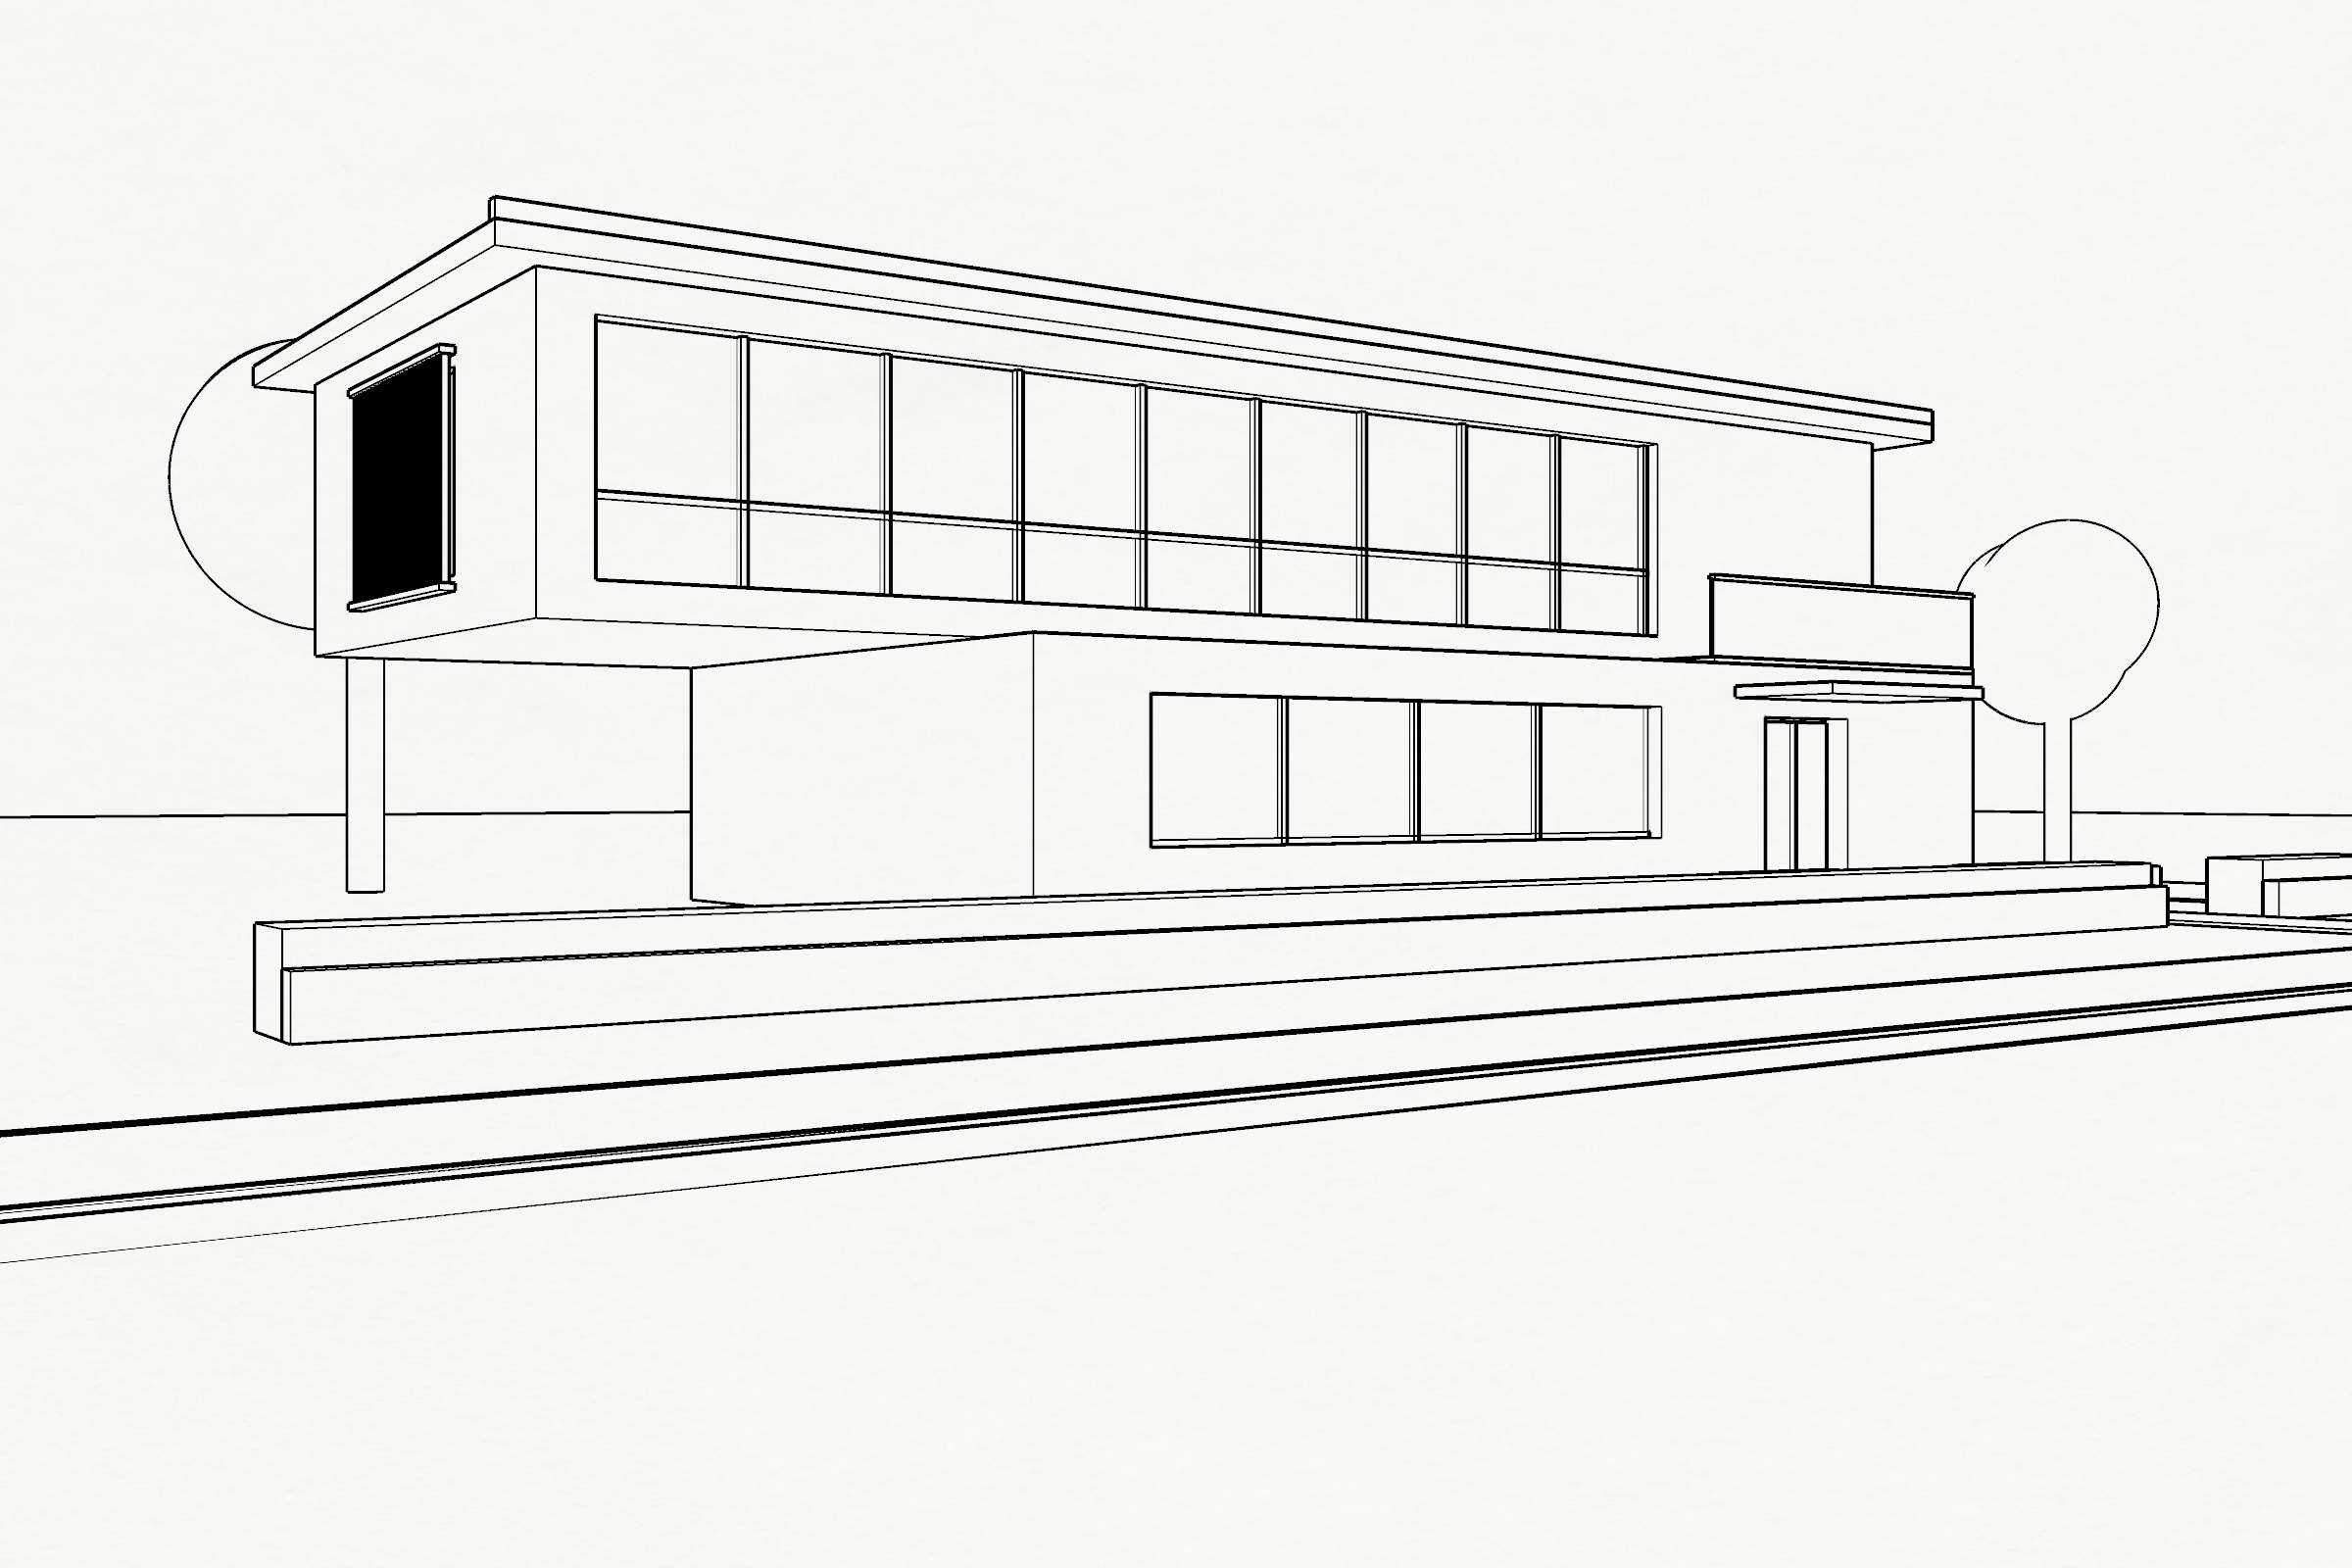
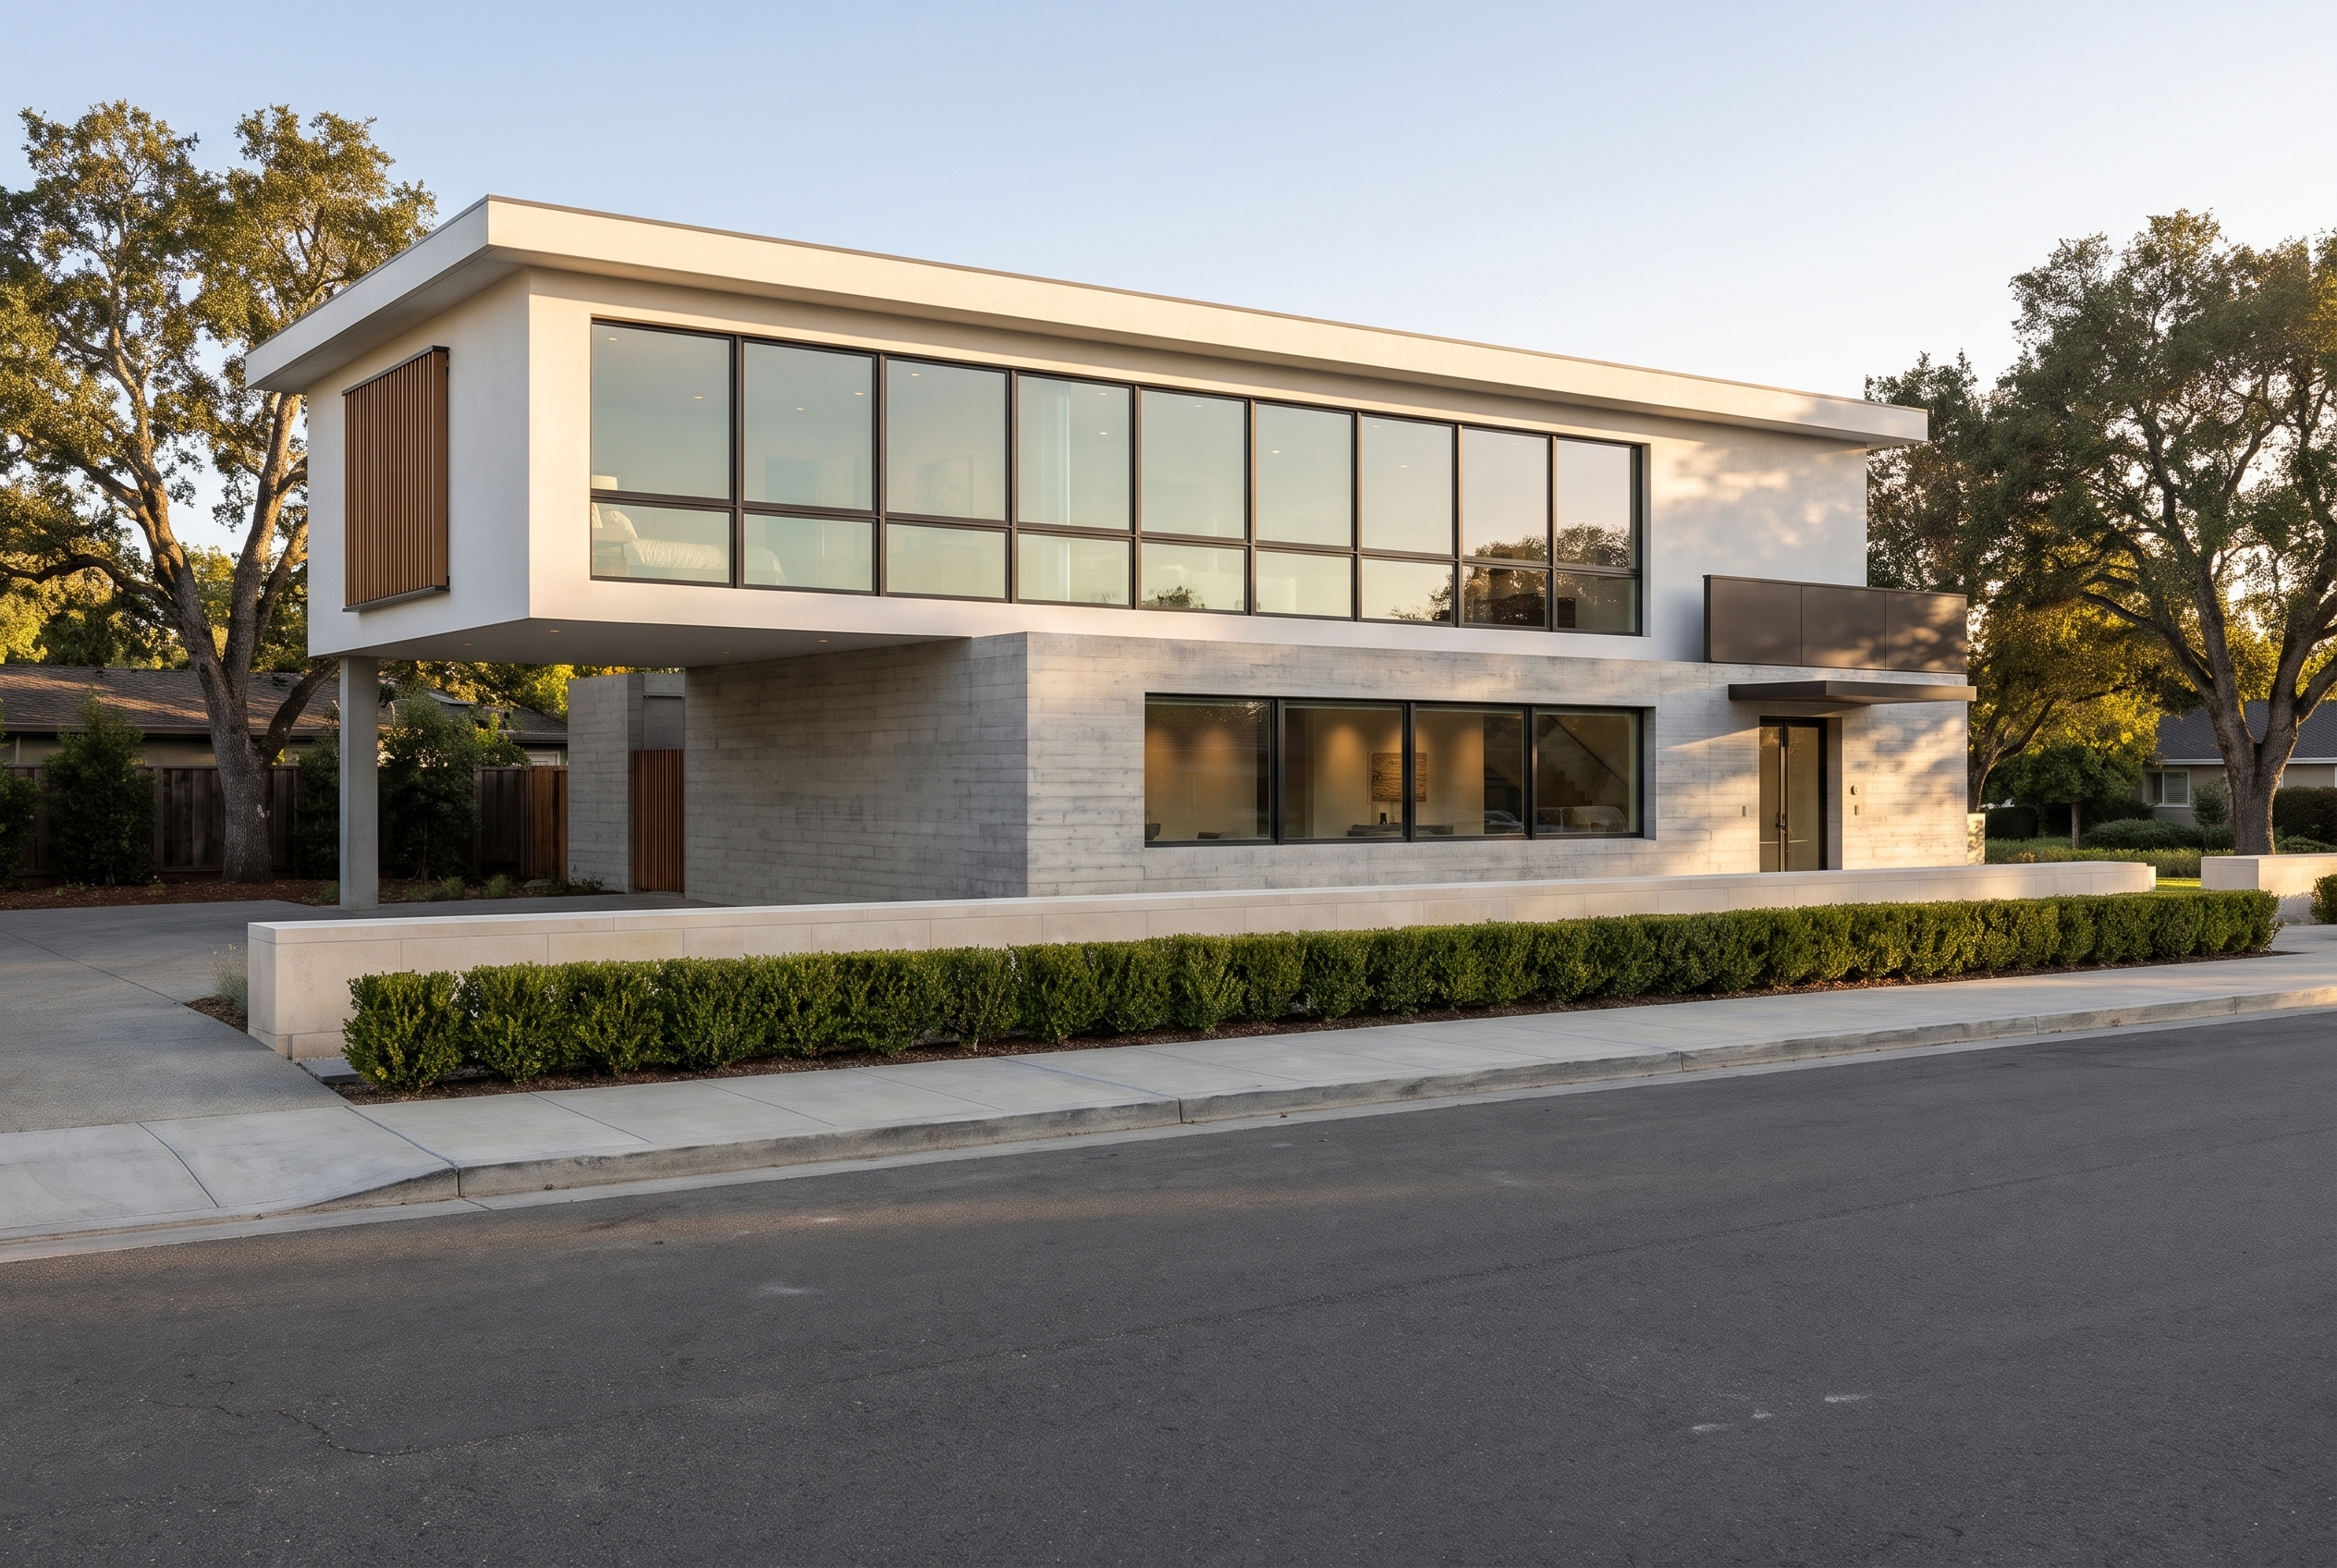
Pen: Lovspark held the outline and camera, but the horizontal transom in the upper window disappeared.
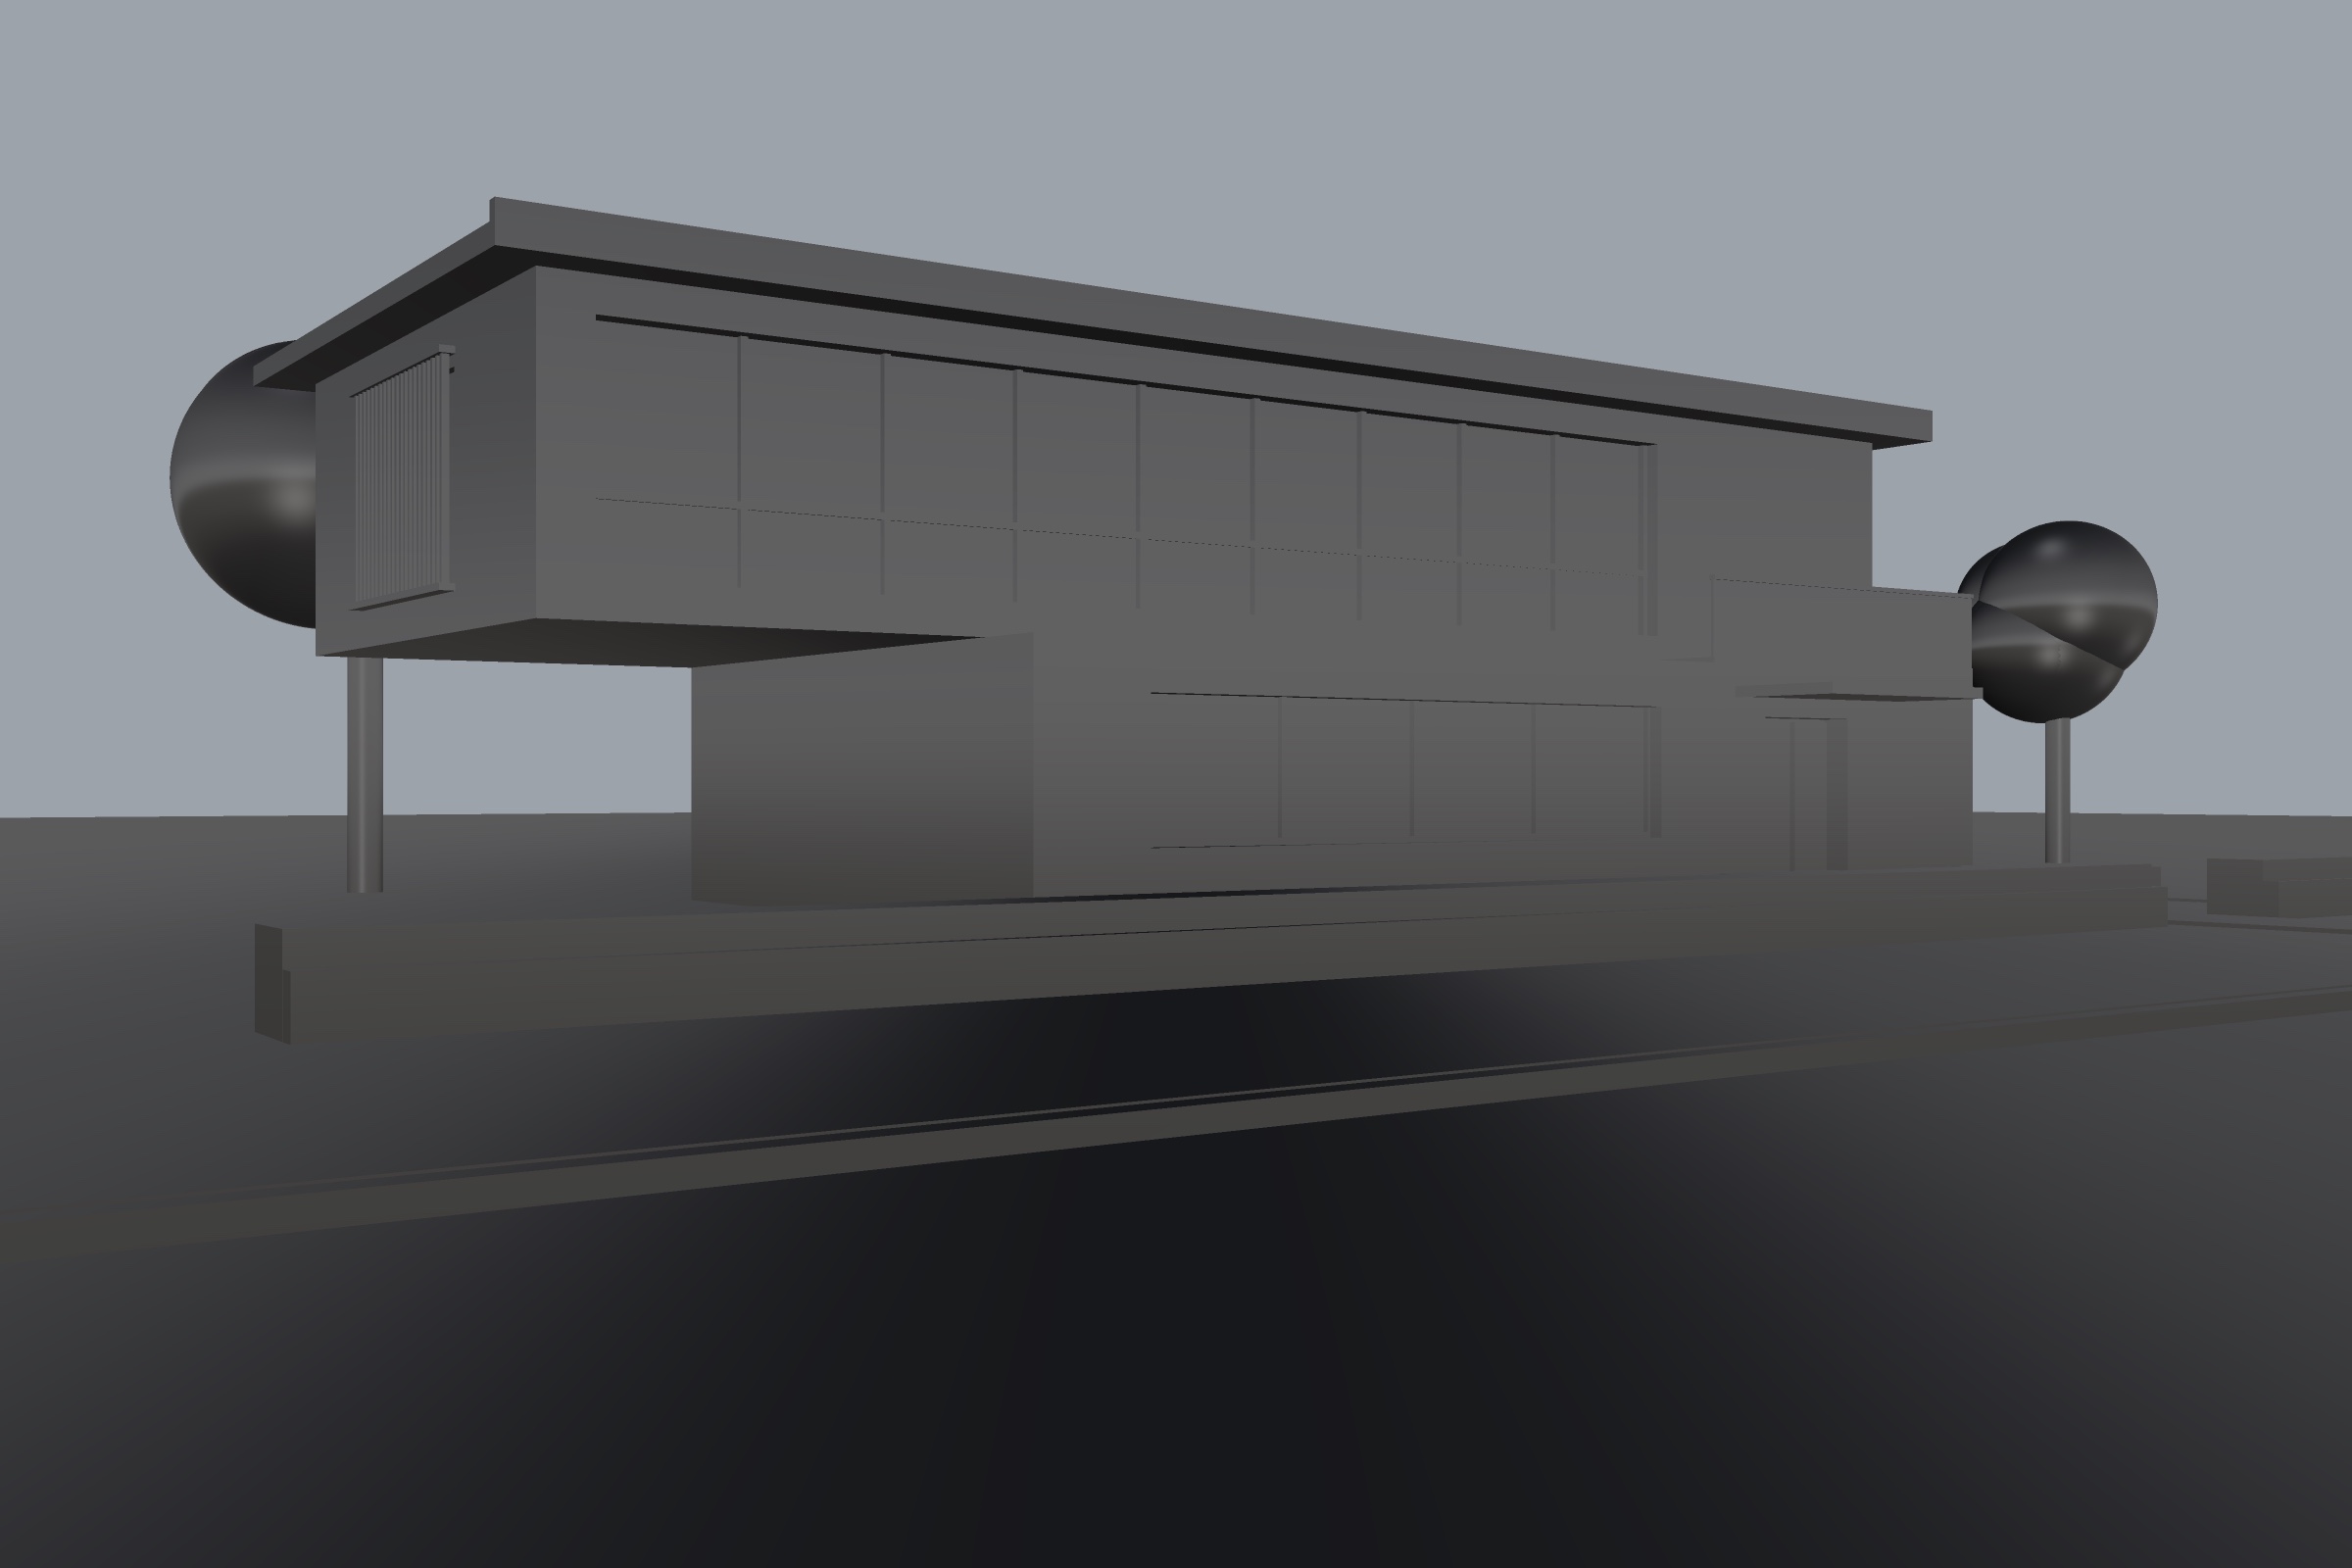
Shaded: thin lines on dark gray carry little contrast, so Lovspark's AI dropped the transom and one window bay. The dark input did not darken the render itself.
| Display mode | What Lovspark's AI kept | What it lost | Use it? |
|---|---|---|---|
| Arctic | Massing, camera, mullions and transom, canopy, slats | Nothing we could see | Yes, first choice |
| Technical | Massing, camera, transom | One window bay | Yes |
| Pen | Massing, camera, outline | Window transom | For sketch-like inputs |
| Shaded | Massing, camera | Transom and one bay | No |
How far this goes: the Lovspark test used one model, one camera and one AI run per mode. It shows a clear pattern, high-contrast light inputs keep more detail, but it is not a benchmark. Run your own model twice before you settle on a mode.
Step 3: export with ViewCaptureToFile
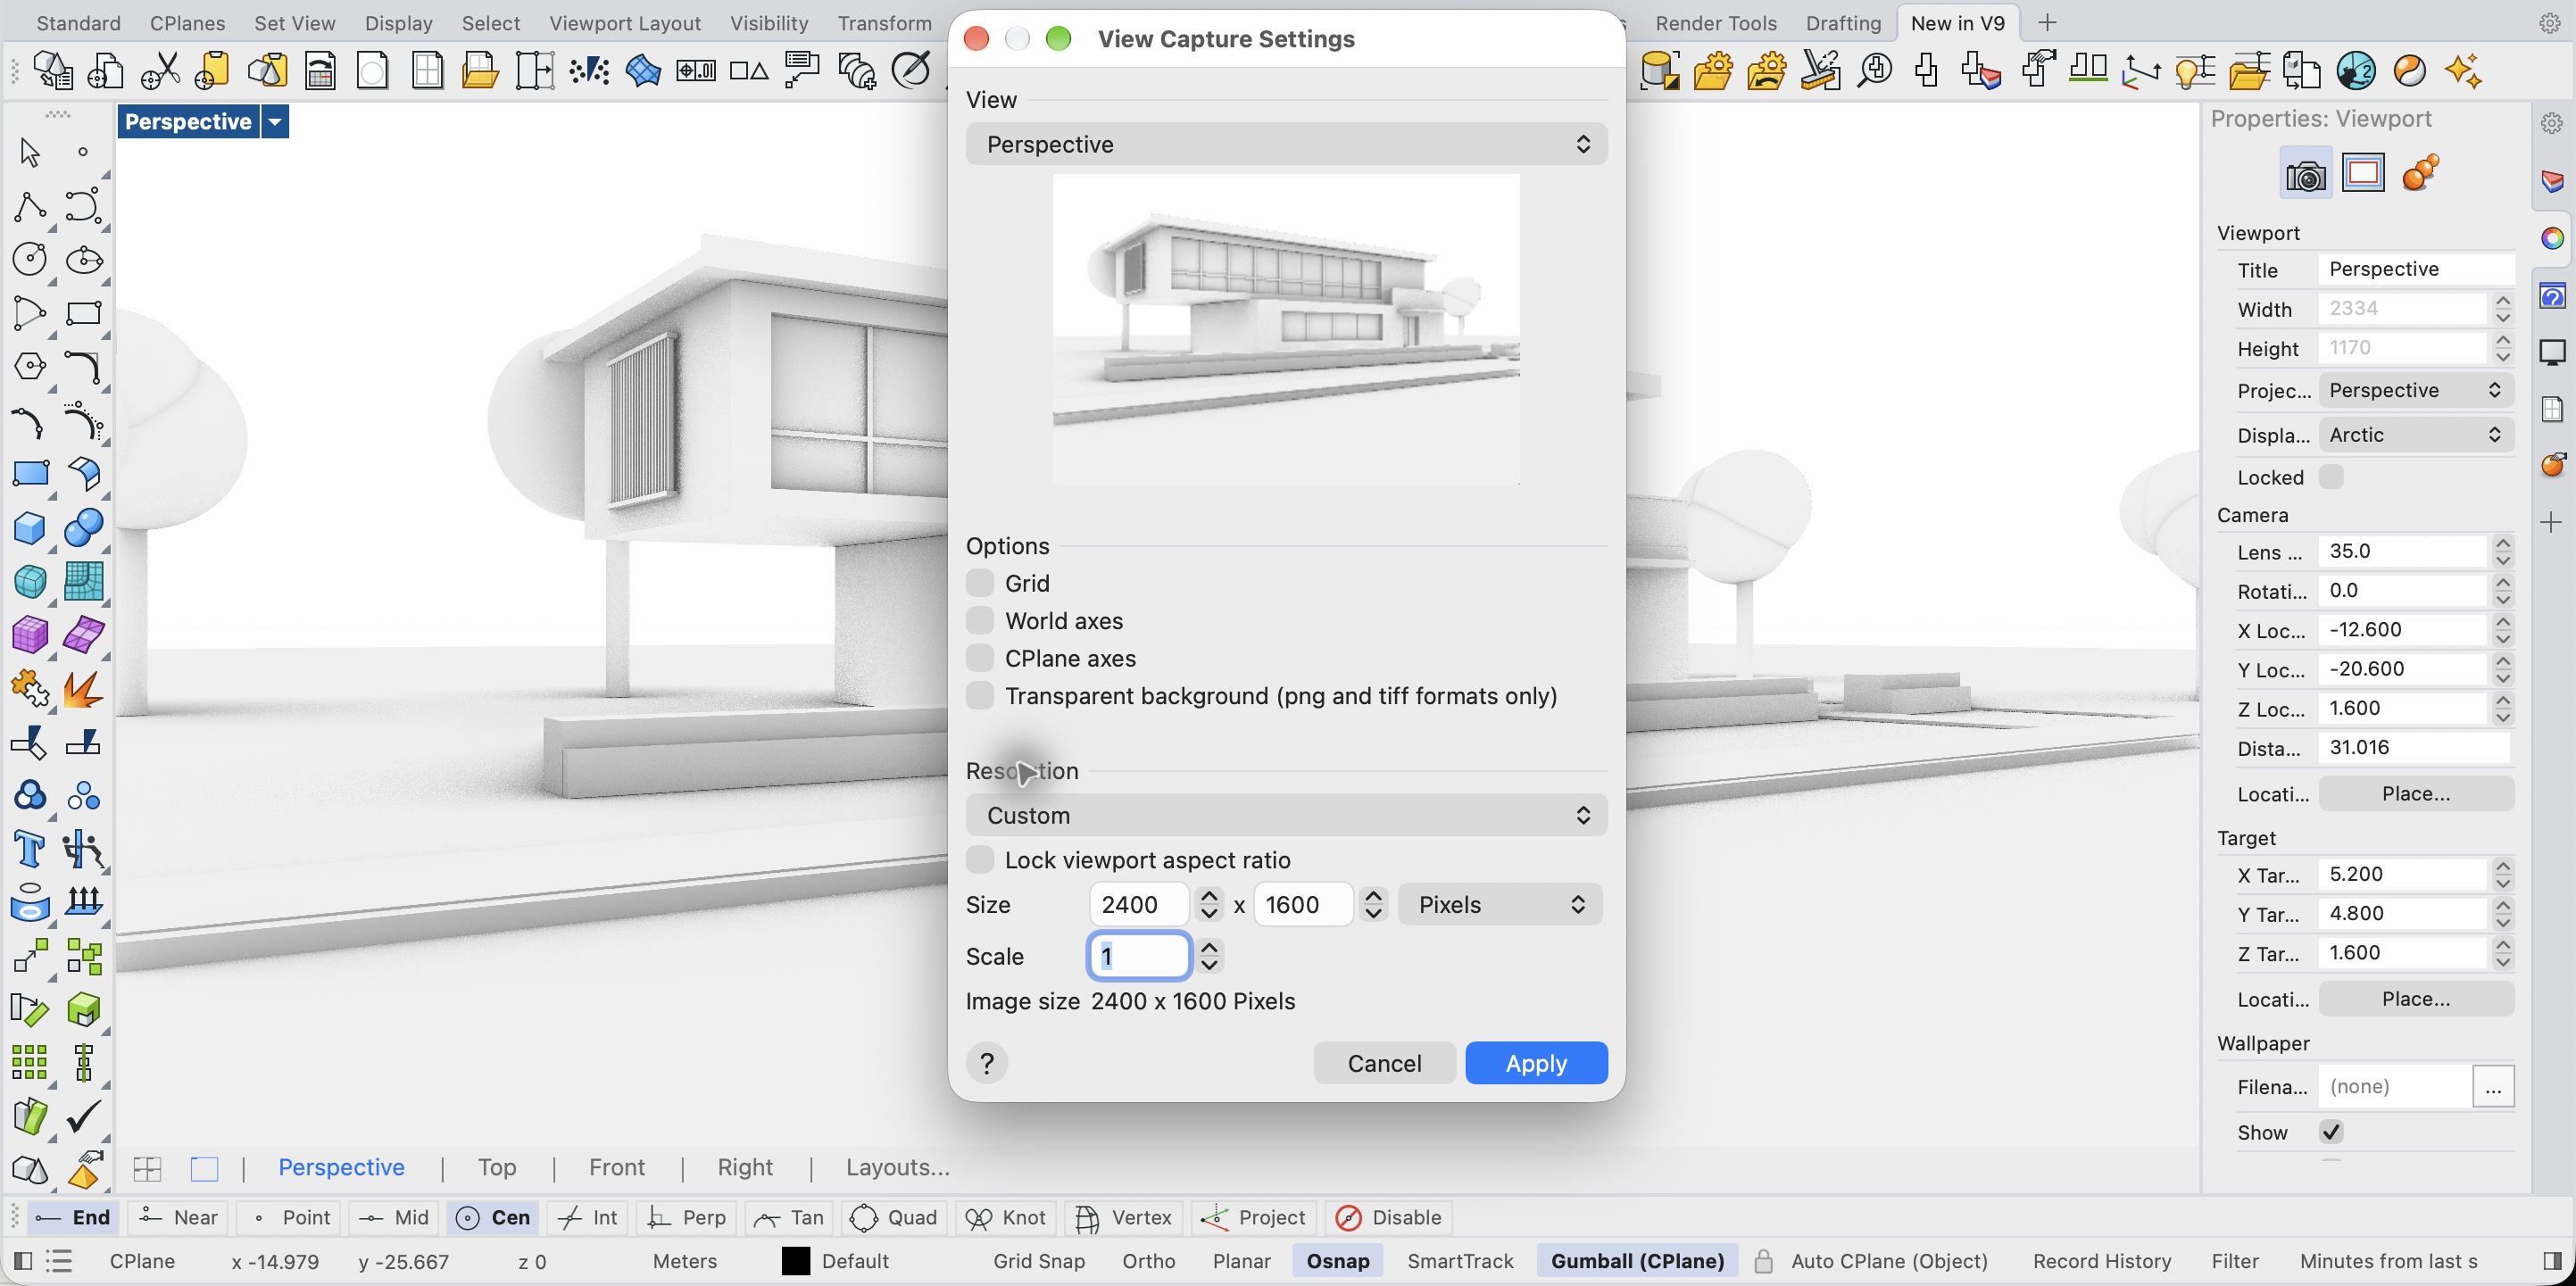
ViewCaptureToFile saves the viewport at the width and height you choose, regardless of the viewport's size on screen, and leaves out viewport borders and the cursor.
- Type ViewCaptureToFile, or use Capture › To File from the viewport title menu.
- Leave Grid, World axes and CPlane axes unticked so no helper lines end up in the Lovspark render.
- Set Resolution to Custom and enter at least 1600 px on the long side; we used 2400 × 1600.
- Save as PNG or JPG, the two formats Lovspark accepts for upload. Raytraced views also show a Number of passes setting, so the capture waits for a cleaner image.
Step 4: render the capture with AI in Lovspark
- Upload the Arctic capture to AI Architectural Rendering on Lovspark. Lovspark AI keeps your massing, openings and camera and adds materials, landscape and light.
- Add a material reference photo when you want a specific facade; Lovspark takes its materials, not its shape.
- Keep the output ratio in Lovspark the same as your capture. A different ratio makes the AI reframe the building.
- For single-family homes, 3D House Rendering adds house styles and garden planting in one pick.
Common problems and fixes
- The capture is blank. Check the document units. A model drawn in meters inside a millimeter file puts a 1.6 camera height at 1.6 mm, inside the ground. The Lovspark team hit exactly this while building the test model.
- The building looks like a toy. The site plane's edge is visible. Enlarge the ground plane.
- Walls lean inward. The camera looks up at the target. Use Two-point perspective or level the camera.
- Small details vanish. Low contrast input. Switch from Shaded to Arctic or Technical.
- Parts of the façade are wrong. Something in front blocks them. Move placeholder trees and people behind the building.
Frequently asked questions
What is Rhino rendering?
Rhino rendering is turning a 3D model into a finished image, either with the built-in renderer and plug-in engines or with an AI renderer that works from a viewport capture. Native rendering needs materials, lights and an environment; an AI render on Lovspark needs one clean capture and adds materials, landscape and light itself.
How do I render in Rhino 8?
Assign materials, add lights and an environment, then use the Rendered or Raytraced display mode or the Render command, which renders with the current renderer in a separate window. For a quick AI render instead, export a clean viewport with ViewCaptureToFile and upload it to Lovspark AI Architectural Rendering.
Which Rhino display mode is best for AI rendering?
In the Lovspark test, Arctic kept the most detail, Technical came second, Pen lost a window transom and Shaded lost the most. Bright, high-contrast captures give the AI clearer edges to follow.
What is Arctic display mode in Rhino?
Arctic is a built-in display mode that shows every object and the background in white with soft shadows. It looks like a white clay model, which is why Lovspark recommends it as an AI rendering input.
How do I save a high-resolution image from a Rhino viewport?
Run ViewCaptureToFile, set Resolution to Custom and enter the size in pixels. The capture ignores the on-screen viewport size, and the Scale field multiplies the resolution further. A long side of 1600 px or more is enough for Lovspark.
Will an AI render change my Rhino geometry?
Lovspark AI is told to keep massing, openings and camera, and in the Lovspark test the outline never moved. Fine details such as a window transom can be simplified, especially from low-contrast captures, so compare the render with the model before sharing it.