Build a moodboard that renders well
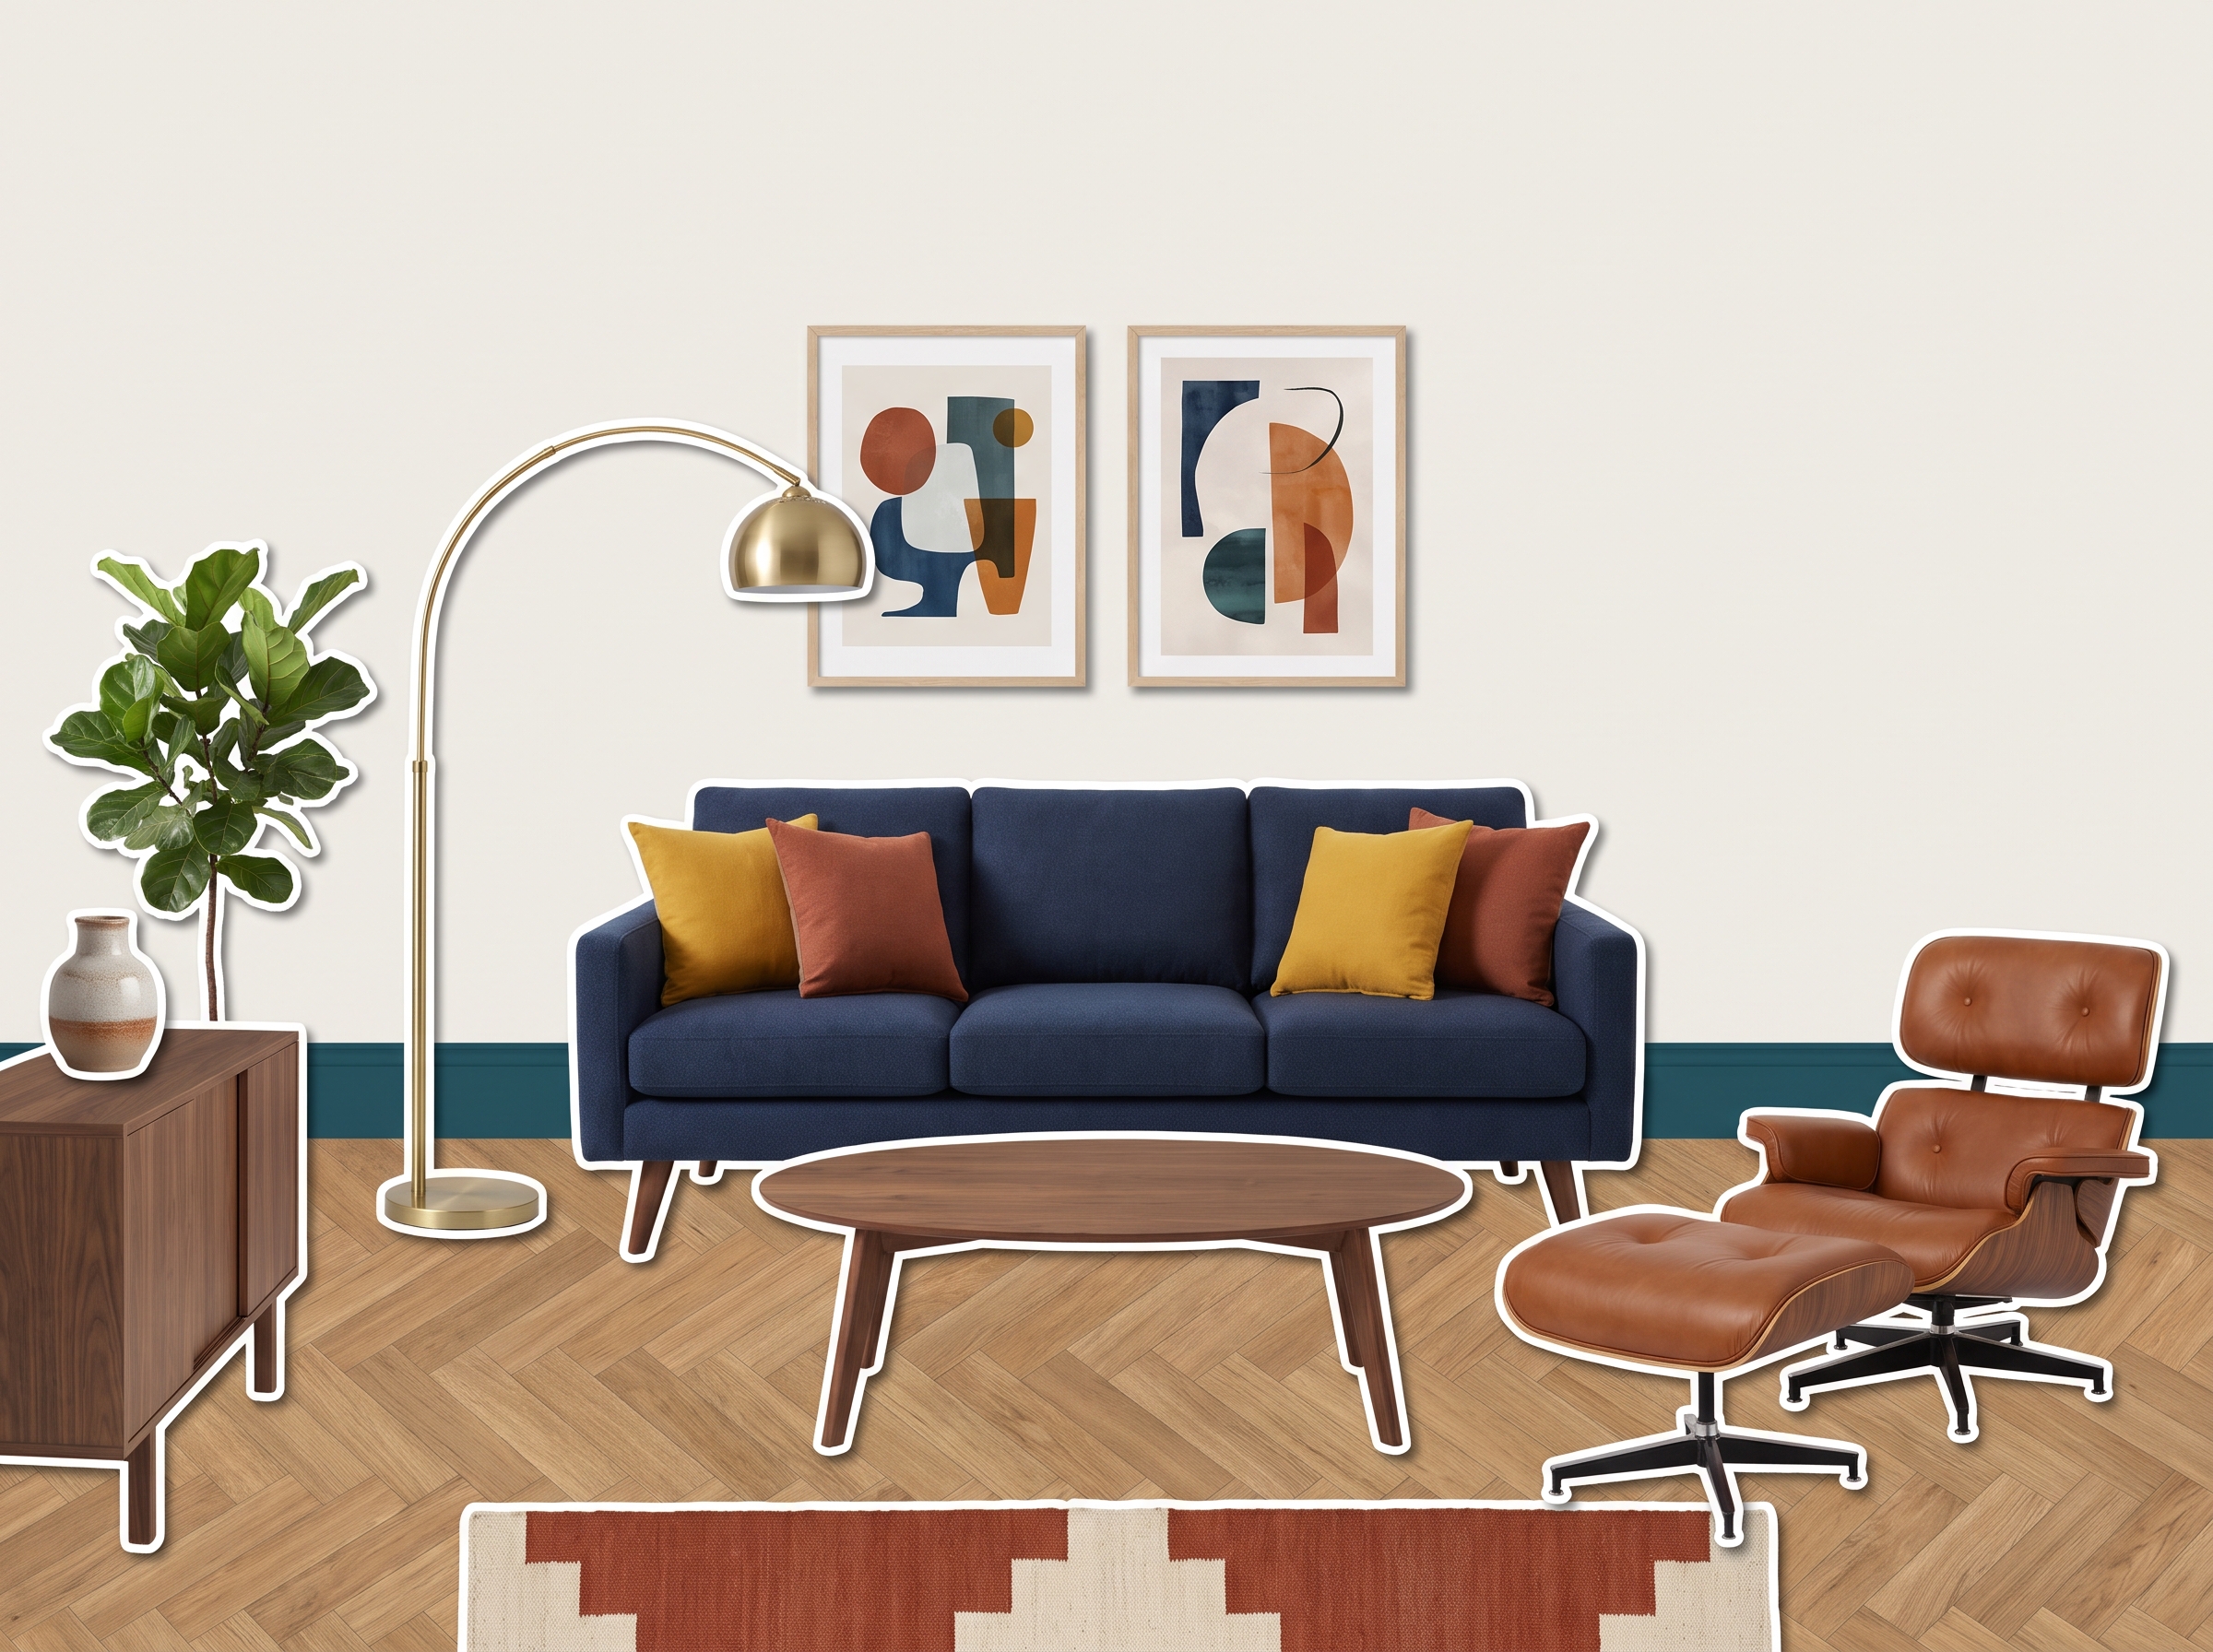
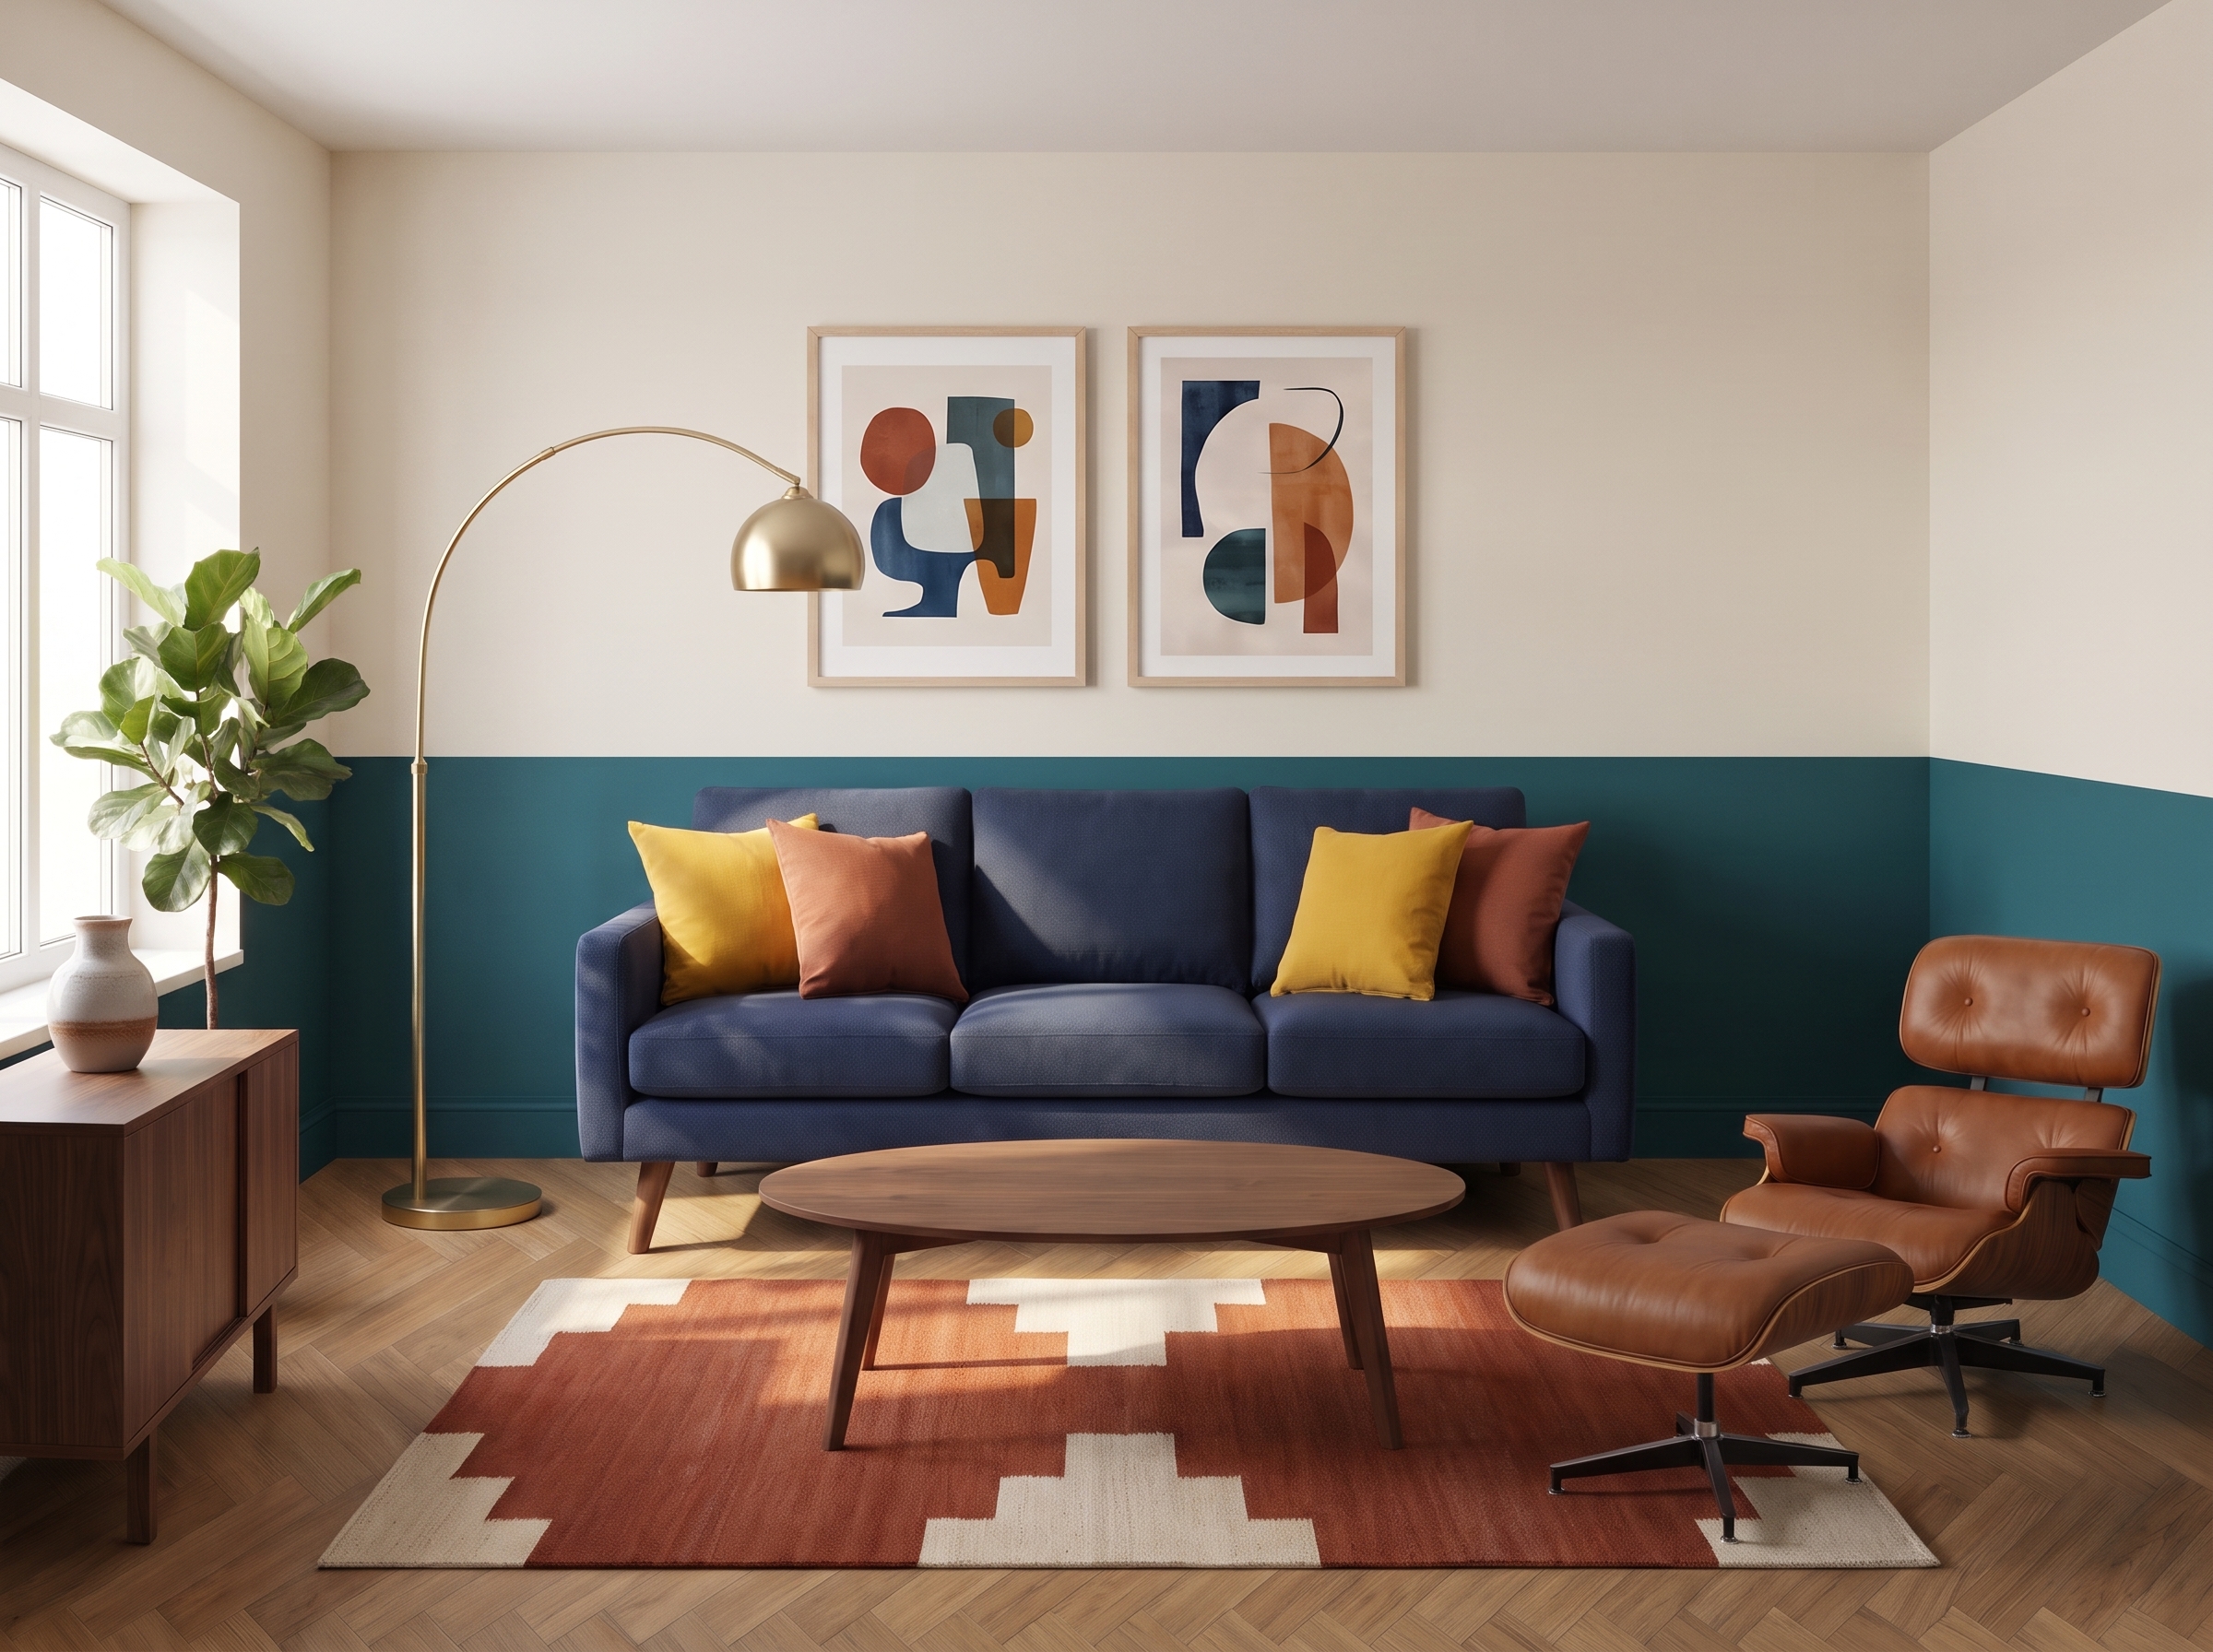
Lay out one room seen from the front, with each piece roughly where it sits. The AI in Lovspark reads what is in the moodboard and where it is, so a little order and a selective set of pieces go a long way.
- One room per image. Split an open-plan space into two collages if the zones are very different.
- Place the big pieces first: sofa or bed against the back, tables in front, chairs to the sides.
- Keep one option per key piece. Two sofas means the AI has to guess.
- Show finishes as large samples: a strip of floor, a patch of wall color, the rug laid flat at the bottom.
- Use cut-outs on a plain background rather than product photos that come with their own room.
- Leave a little space between pieces so every edge stays readable.
Source: Figma: How to Make a Mood Board in 5 Steps
Common mistakes
Most weak renders come from the input, not the lighting choice. Check these six things before you run it again.
- A Pinterest-style grid with no layout, so the AI cannot tell what goes where.
- Pieces that are too small: a side table at thumbnail size often disappears.
- Two rooms in one image, such as a kitchen island next to a bed.
- Product photos that already show a room, which adds walls and lamps you did not choose.
- Text, logos and price tags left on cut-outs; they can end up redrawn as marks on furniture.
- Expecting exact products. Treat the render as a direction and check the key pieces.
Flat or perspective collage?
Use a flat collage for speed and a perspective collage when the camera angle matters. A flat collage puts every piece on a simple wall-and-floor background, like the living rooms and bedrooms on this page. It is the fastest to make, and Lovspark AI builds depth and light around your arrangement.
A perspective collage pastes cut-outs into a photo of an empty room, as in the office, meeting room, café and lobby examples. Use it when the camera angle or the architecture matters, for example when you already have a site photo of the space you are designing.
Choosing a lighting type
Start with Realistic Texture, then try the other lighting buttons in Lovspark: they change the mood of the same room without changing the furniture. Use the design description only for direction, such as “light from the left”.
- Realistic Texture: even, neutral daylight that shows materials and fabrics most clearly. A good first run.
- Bright contrast: a brighter room with lamps on and stronger contrast, for a crisp, polished look.
- Natural light: sunlight through the windows with soft shadows, for a daytime, lived-in feel.
- Soft night: an evening scene lit by pendants and table lamps, for bedrooms, lounges and hotel lobbies.
AI render or 3D?
Use an AI render to agree the direction and a 3D model to finish it. An AI render answers one question quickly: does this mix of furniture, materials and colors work as a room? It suits early concepts, client conversations and comparing options, and it needs nothing more than an image.
A full 3D model, rendered in tools such as V-Ray or Enscape, is still the right tool when you need exact dimensions, several camera angles, walk-throughs or drawings for a contractor. Many teams use both: AI renders to agree the direction, then 3D once the choices are fixed.
Source: Chaos V-Ray, Chaos Enscape
Before you upload
Check the image for these four things; a minute here saves a wasted run.
- Upload a JPG or PNG, or paste it straight from your clipboard.
- Export the board large enough that small pieces stay sharp; a tiny screenshot loses detail.
- Crop away empty margins, titles and labels around the board.
- Keep the whole room in one landscape image rather than splitting it across slides.